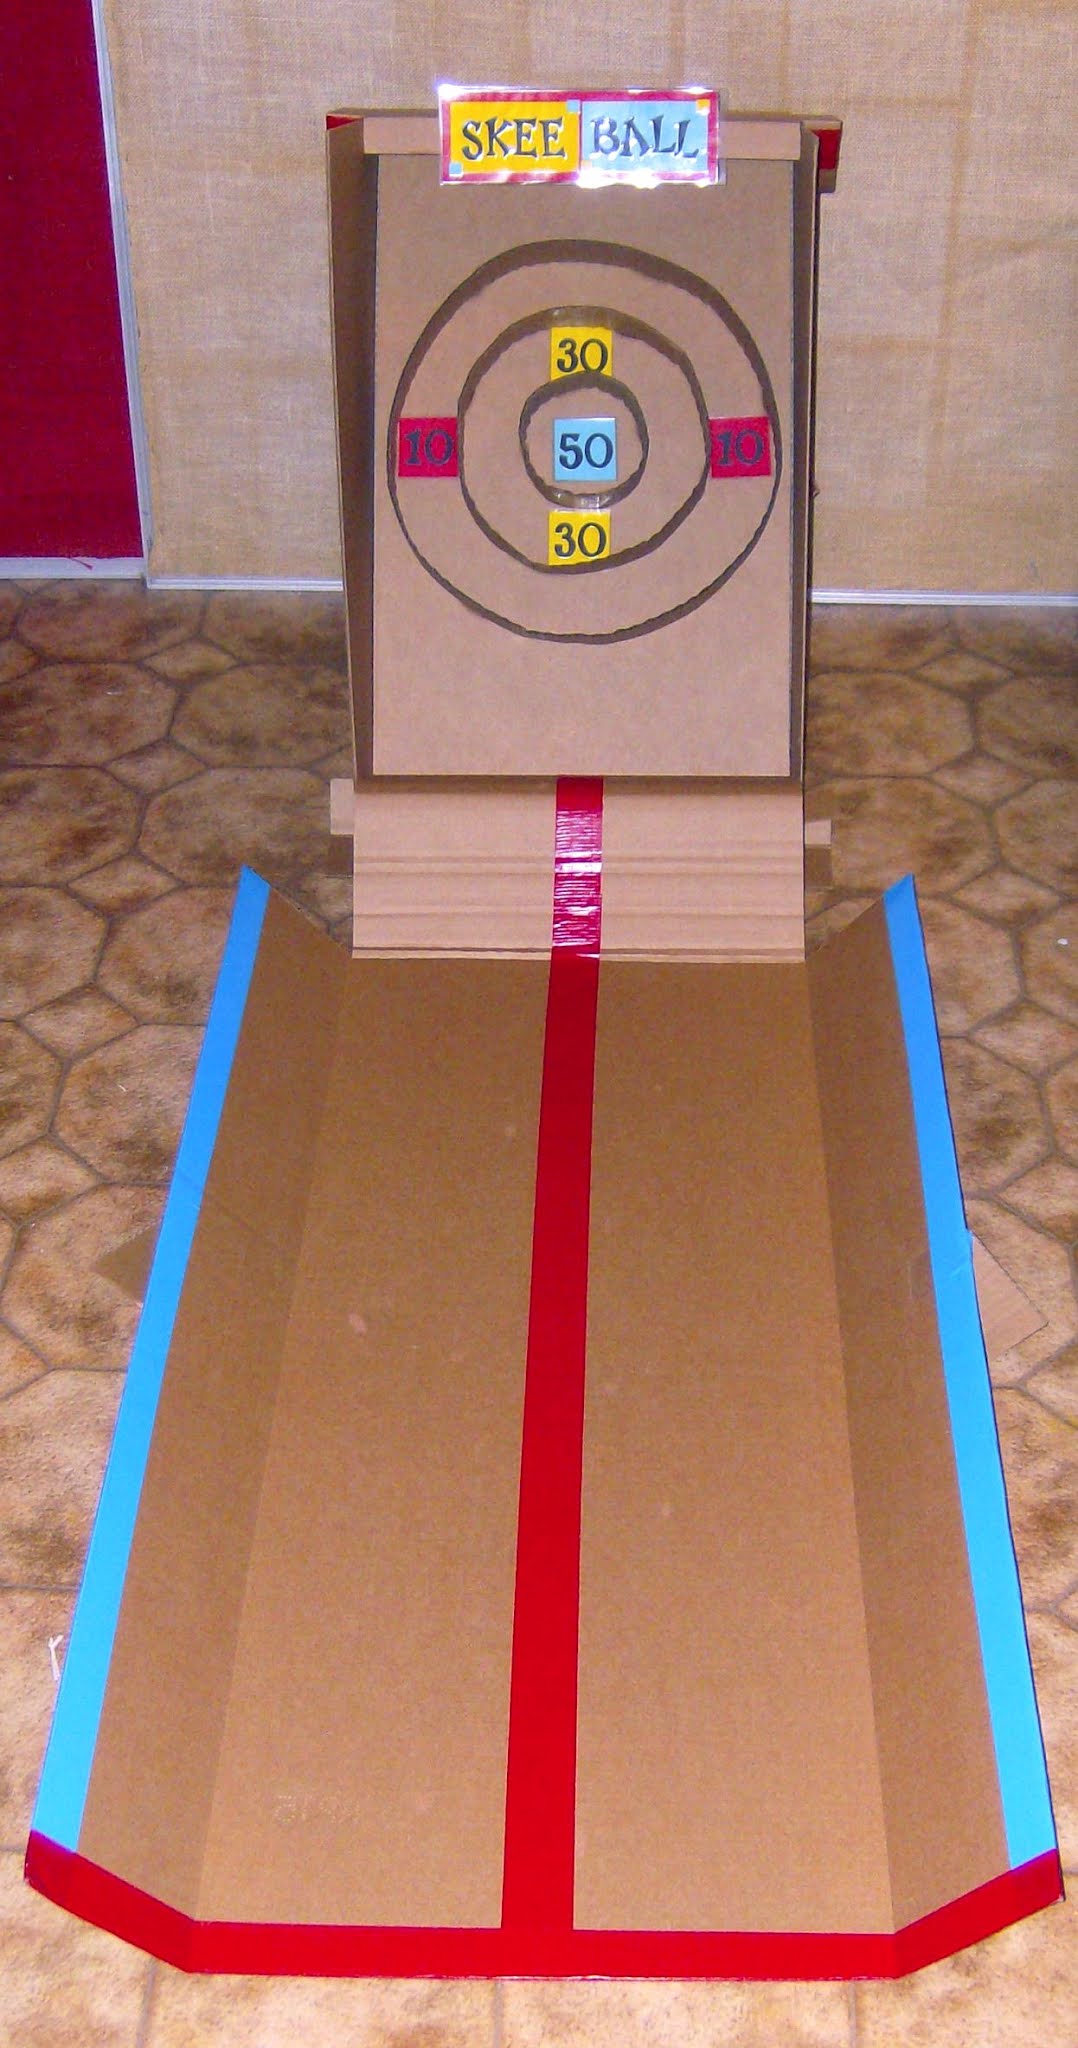
This month our Art Adventurers made backyard arcade games from cardboard, so I wanted to make a game too! (I know, I'm just a big kid!) Since we have several large sheets of cardboard I decided to make something that needs a long smooth ramp. So I made a skee ball game! It was a hit with the kids and easy to make too. My design is assembled with edge slot inserts and tabs & slots; not taping or gluing. That way you can easily disassemble it anytime and store it until you want to play again. (This game does take up room.)
Want to make one of your own? Here's how!
You will need:
ü Cardboard - a nice sized sturdy box plus one unblemished and unbent sheet, like the side of a large appliance box
ü Colored duct tape, for color only
ü Clear packing tape and masking tape
ü Pencil compass (you can make one)
ü Sharpies or a printer, and colored paper
ü Sharp utility knife
üRuled metal T-square (mine is 30 inches long) and/or a yardstick
You'll start by creating the game face. You'll need a nice smooth sheet of cardboard, cut to about about 18" (width) by 30" (height). I use a metal T-square and a sharp utility knife to cut nice straight edges. Be sure to protect your work surface. I use a large piece of chip board topped with a thick sheet of cardboard as a cutting surface.
Now you will trace your circles using your pencil compass. (Or you can simply trace round objects that are about the right size.) Find the approximate center of the board and make a dot. Then use your compass to make as large a circle as you can fit within your game space. Mine is 16" in diameter. Then make a smaller circle inside the first, like a bullseye. Mine is 10" wide, leaving a nice 3" space outside of it. The third circle is then drawn in the center. Mine is 5" in diameter, leaving a 2.5" space around the outside.
Next, you will cut 3" strips that are long enough to bend around the circumference of each circle. How do you find the circumference measure of each circle? Well, you can measure it with a ruler - which is not easy. What is easy is to do a simple math problem (this is where math actually does come in handy in real life). Simply multiply the diameter (the line across the circle from one side through the center point to the other side) times pi (3.14) to get the circumference, then cut your cardboard that length. Best to make it a bit too long - then you can always cut off the excess.
Here's the formula: C = ℼd
My largest circle has a 16" diameter. So I multiplied 16 x 3.14 (the value of pi) for a circumference of 50.24 inches. I cut the first strip 52 inches long, planning to cut off the excess after attaching it to the board. Do the math with all of your strips and cut them out, being sure that you cut across (not along) the corrugated lines in the cardboard so that the strips will bend easily.
Your rings need only be 2 inches wide, so now you will draw a line one inch from one of the edges of your 3-inch strip to create a two inch strip. The remaining one inch strip will be used to create tabs. Every five inches or so, draw a short line from your 2-inch line to the edge, like this (of course your strips will be longer than in this drawing):
2 inches
1 inch
(You'll make narrower tabs in your inner circles that are also a bit closer together.) Remove the cut out areas and along the horizontal line at the top of each tab make a small snip on each side so sides of each tab can be bent out slightly (which we will do later).
Now you will bend each strip into a nice neat ring. Let the corrugation in the cardboard help you as you carefully bend the strip until the ends meet. You can tape them together with clear packing tape, at least for now. Place the ring, tabs down over your drawn circle on the board and mark where each tab touches the circle. Be sure to mark the entire length of each tab so you will know where to cut your slots.
Next, place your board on your cutting surface and cut a slit where the tab markings are. I cut my slits just a bit shorter than the markings so the tabs can be folded slightly and stuffed through, then flanged out in the back to secure the rings so they won't fall out.
This is how the rings and tabs look after they've been attached. Look Ma! No tape!!!
Now you can draw your scoring numbers directly on the game face, or on pieces of paper (easier) to be attached. Or you can print them out or use die cut numbers and letters, which is what I used on brightly colored card stock. I also laminated everything. If you don't have a laminator, just use clear packing tape if you like the laminating idea. Then just attach each piece to your game with a rolled up piece of masking tape.
Next, we will create two sides to hold our game face in place. I used two more sheets of cardboard about the same size as the first one. Then I cut the bottoms at a slant so the game will lean back. The front edges of these are 29" and the back edges are cut 5" shorter to 24". Now you will cut two 1 inch strips of very thick cardboard for the game face to rest on and glue them to the sides. (You can glue several strips together to make them thicker if needed.)
You will now cut some braces to put the sides into a standing position, making sure the cardboard game face rests are leaning towards the back of the game.
Here I have made two braces, each about 20" long and a couple of inches wide. Attach them using slits cut into the game sides and cut near each end of the brace. These make strong connectors, but are also easily disassembled!
Place the game face onto the thick carboard rests and make sure everything fits. Then make additional braces to keep your game from tipping over.
I made these three braces and they seem to work pretty well. Top brace (with sign), middle back brace (very simple), and bottom front, which is bent to hold the bottom of the game face when it is slipped into place.
This is what I decided to do for the top brace, just to securely hold the sides in place but also easy to remove when disassembling the game. I know, kind of funky, but hey! They work!
This is what the back looks like when it's all put together.
Now all you need to do is build your ramp! I used a piece of cardboard cut to about 28" by 55", but you can use what ever you have available. I wanted a long ramp for plenty of ball rolling fun!
I cut the upper end of the cardboard ramp to the same width as the game face so that it could fit into bottom of the frame. I cut off upper the corners of the cardboard about a foot down, then left the remaining cardboard to be folded up to create side rails that will keep the balls (somewhat) on the ramp and in play.
Then I folded the ramp up and then down to create the "bump" that sends the balls flying into the scoring rings. Just use a scrap of cardboard and packing tape to hold it in place.
Now you can go ahead and fold up your side rails, which is tricky because you are folding against the grain. Here's what to do:
Draw a line on the bottom of the cardboard where your fold will be. Now along this same line, drag the edge or tip of a pair of scissors to create a good indention. It's okay to cut into the cardboard slightly. Now bend the cardboard down over the edge of your work surface. You can also add a few braces to the side rails to keep them from folding flat while in play.
Now you can flip over your ball ramp and decorated it at will with a few strips of colorful duct tape! I found that it actually makes scoring easier by placing a piece of tape right down the center of the ramp. I also wrapped a piece of red tape around the front end of the ramp to protect it from being torn up and to as a reminder not to step over the line!
Use small heavy balls for this game. We collected all the balls we could find that had a little weight to them. Players could select any 3 (or 4 or 5 etc.) balls for their turn.
Of course, you can make up the rules as you go!