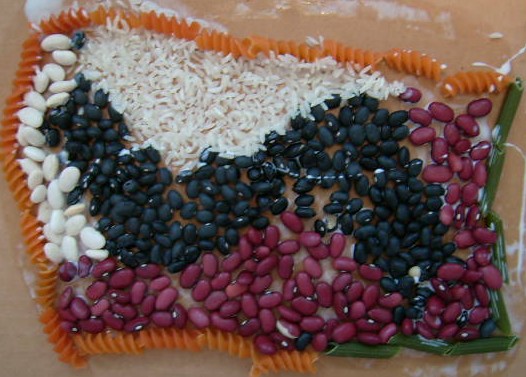
 There are many different ways to create a mosaic. With young children, the idea is still the same: provide them with an art activity that is fun and open-ended. Mosaic activity ideas might include furnishing small pre-cut paper squares (no more than one by one inch) of various colors to be glued to a piece of paper; or it might be providing three-dimensional materials to be glued to a stiff backing. These could be man-made objects such as tiles, cut linoleum, or seaglass; or natural objects such as seeds, bark, twigs, seashells, pebbles, and leaves. We decided to create three-dimensional mosaics using dried beans, seeds, and uncooked pastas; such as the one above created by five-year-old McKenzie. Our four- to six-year-olds thoroughly enjoyed this project, so your youngster may enjoy trying it too.
Materials:
Precut corrugated cardboard squares, about 8 x 8 inches each
Seeds, dried beans, and interesting macaroni products, such as:
white beans, black beans, small read beans, pinto beans, black
eyed-peas, split green peas, white rice, spaghetti, Wacky Mac
veggie-shaped pasta
Muffin tin
Meat tray, cleaned and dried
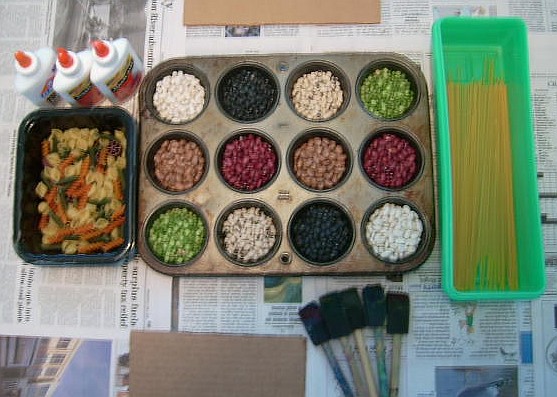
White glue poured in plastic covered container
White glue in original bottle
Water in open container
Small sponge brushes, one for each child
Moist rags (for wiping hands)
Paint smocks or old shirts
Newspapers
Preparation:
Cover table with newspaper. Set out separated seeds and dried beans in muffin tin, pour pasta into meat tray, and place white rice in a disposable cup (for pouring). Place all in center of table. Add one part water to three parts white glue in plastic containers and stir. Place on table (one can be shared by two children) with additional glue in original bottles. Place water container on table for cleaning brushes. Place a piece of cut cardboard and a sponge brush at each child’s place. Put moist rags nearby.
What to do:
1. Talk for a few minutes about the materials on the table. Name the different types of beans and seeds on the table, and talk about the various colors and the differences in size and shape, as well as the various types of macaroni shapes. Introduce “mosaics,” and talk about how can make them using various materials to “paint” pictures.
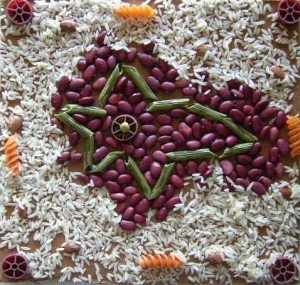 2. Demonstrate various ways to do this: You can use one type of item (such as black beans or pasta) and a line of glue to outline shapes. You can glue on spaghetti to make straight lines (long or very short). You can fill in areas with glue and a poured material such as split peas or rice. You can glue interesting items around the outer edges. As you can see, six-year-old Lindy used most of these techniques in her mosaic creation.
3. Once the child has a basic understanding of the project, put on paint smocks and let him begin to apply the glue and place the mosaic materials on his project board. Monitor the glue and the other materials. He may use too much glue or simply pour the beans in piles onto the project. Help him to think about what he is doing and remind him that the materials need to be glued on in a single layer so they will stay on when you turn the cardboard sideways (which you should help them do every so often, then re-use any fallen materials).
4. Once your child decides he is finished, make sure he has covered all of the wet glue with mosaic materials. Allow the project to dry. If he would like, let your child select another sheet of cardboard to make another mosaic.
5. Once the mosaic is completely dry, it can be sprayed or painted with a clear glossy acrylic finish.
No comments:
Post a Comment