 Children love to paint. They also love to look at, learn about, and draw animals. So why not paint their favorite wild animals? Our Art Adventurists loved this project, and the painted and stamped "frames" really gave their pieces a nice finished look.
To the right are two paintings of a tiger. Neither was drawn first; the children just dove right in and painted, with spectacular results. Don't you agree?

"Tiger" by 8-year-old George,
(above) and "Smiling Tiger,"
by 7-year-old Kelly
Paint Wild Animals in Tempera
Materials:
Heavy sketch paper, watercolor paper, or other appropriate paper, 11 x 14 or larger
Tempera paints, each color in its own covered plastic container
Assorted brushes
Assorted foam stamps (small - you can make your own)
Old pie tins (palettes)
Large water containers
Plastic knives (palette knives)
Paint smock
Paper towels
Newspapers
Pencils
Books / magazines with good color pictures (art or photos) of wild animals (Zoo Books are great)
A prepared stack of good color photographs of wild animals in their natural surroundings, cut from National Geographic, old calendars, etc.
Sample animal painting with stamped frame (if you have one)
Preparation:
Cover table with newspapers. Set out covered paints, brushes, and filled water containers. Soft margerine tubs are great for paint and water. Set out paper on table and photos for children to look through. Display the sample painting.
What to do:
1) Talk about wild animals and your child's favorites. Look through books and /or magazines at wild animals and how they are depicted.
2) Now look through the photos and have your child choose an animal that he would like to paint. (Use individual photos instead of books or magazines so that if paint is splattered on them it won't matter - plus photo cutouts are easier to work with than an open book.) Explain that the photo is a reference only; that is, its purpose is to help him remember what the animal looks like. He needn’t copy it exactly; in fact he may change the background, the number of animals, or anything else he wishes.
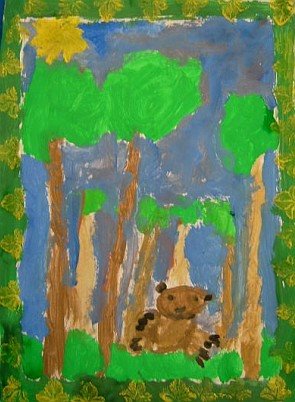
"Lion Cub" by 7-year-old Ashley
3) Put on painting smock.
4) Two rules for painting: Cover the paper surface completely with paint (don’t leave large white areas unpainted); and paint the frame last. (Show sample painting as an example.)
5) Here is the basic procedure for painting:
a) Visualize your composition on the paper first; pencil it in if you like.
b) Decide what colors you will need. Remember, you will be mixing your own colors as needed.
c) Scoop small amounts of basic paint colors from paint containers onto your pie plate palette with a plastic knife.
d) Wipe knife with moist paper towel between each color. That way you will not contaminate the other colors.
e) Mix the colors you need for your painting on your palette using your knife or your brush.
f) While painting, clean your brushes often in the water containers. Don’t let paint dry in brushes. Use paper towels to remove excess water from brushes.
g) Use the blow dryer to quickly dry areas that you want to paint over with contrasting details.
6) After you have completed your painting and washed out your brushes, use a wide (1/2” to 1”) brush and carefully paint a border around the outside of the painting, using a color that complements your painting.
7) After it dries, select a foam stamp that goes well with the theme of your painting (African safari? Woods? Prairie? Beach?) You can easily make your own foam stamps by cutting them from craft foam. Cut out simple designs like zigzags, crescents, or basic shapes like triangles, stars, and dots.
8) Chose a paint color that stands out from your frame color and spread thinly on the newspaper. LIGHTLY press the stamper into the paint, test on clean newspaper a few times, then stamp your frame. You can do this several times before reloading with paint. Leave equal amounts of space between each stamped design.
9) Allow to dry, then display on your wall!
No comments:
Post a Comment