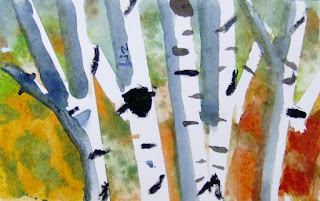
As the summer ends, we've been painting birch trees. We're always inspired by these beautiful trees, as well as the quaking and weeping aspens that grow in our area. The white and black trunks are so lovely, especially with the fall colors coming in. They're wonderful subjects for our little landscapes!
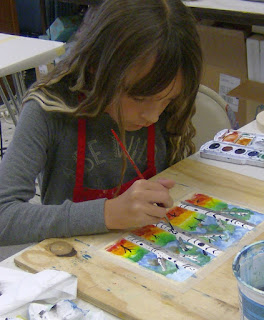
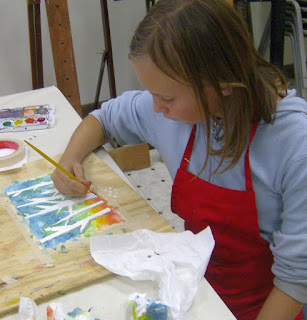
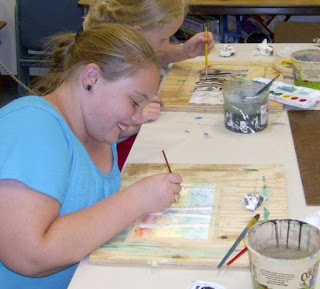
This project is a small 6 x 9 watercolor painting, great for anyone 8 (or so) and up. Our featured artists are ages 8-12.
If you would like to try one, you'll find detailed directions at the bottom of this page.
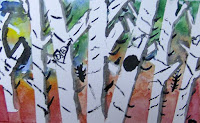
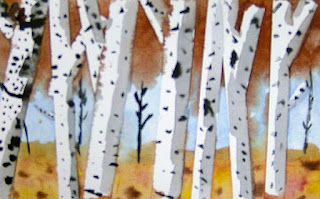
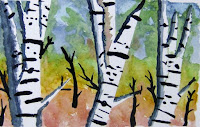
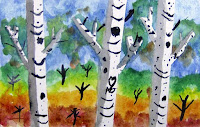
Artwork Gallery:

How to paint your own watercolor Birch Trees:
Tape your watercolor paper, smooth side up, to a heavy board so your paper won't curl. Then tear pieces of masking tape to fit from the bottom to the top of your paper to represent tree trunks. Use a variety of widths (we used 1/2 inch, 3/4 inch, and 94/100 inch). If you have only one size, you can cut or tear some pieces down the center to create various widths for your trees. Stick the tape down in a very unplanned, random way (this is hard for some student artists!) Trees should look like they are growing naturally, not perfectly vertical or lined up like soldiers. Tear smaller, pointy pieces of tape and attach to trunks, pointing slightly upward, in various positions to look like branches and limbs. Now you are ready to paint!
Mix a thinned blue color for a nice, crisp, autumn-like sky and paint the top of the paper. Dab the paint on right over the tape, and leave a few white areas, for a painterly, even an impressionistic look. Use a bit of tissue to pull out some of the paint for puffy white clouds if desired. Mix a few autumn colors, beginning with yellow, yellow green, and yellow orange and dab these colors in as you work your way down, filling in some of the white areas you left in the sky. Try not to create obvious layers or lines of color from one to the next as you move down to the bottom of the painting. Distribute the colors here and there around the painting. Next add orange and red-orange near and down to the bottom, as well as some of your earlier colors mixed in. This might create a few browns, which are also great colors for this painting! When done, allow to dry, or use a blow dryer so you can move on right away.
Now it's time to remove the tape - trees only - not the tape along the paper's edge! Slowly pull off the tape at a slant from the direction of the tree trunk. Also keep the tape flat against the paper - don't pull straight up. This will minimize any paper tearing problems. If any of your paper
does tear, don't panic! You can easily incorporate the "textured" paper into your trees during the next steps.
Now mix a watery grey on your palette using black watercolor and water only. Decide which will be the shadow side of the trees and paint each one grey along that edge, filling in at least one-half of the tree trunk. Make sure your grey is not too light; it needs to look like a distinct shadow - but not black! Add shadows to your limbs and branches as well. Tall branches will be shaded along the same edges as the trees. More horizontal branches and limbs will have shadows along the bottom edges.
Time to add the details! Using black paint (not the watery grey) with a detail brush, add twigs and smaller limbs to the upper areas of the trees, and a few poking out of the trunks. Also add a few tiny lines in the distance to represent saplings, partially hidden trees, and bushes. Add a few more in the foreground to look like fallen twigs, dried grasses, and other woody foliage. Now, add the "eyes" and other black details into the tree trunks. These can be horizontal lines, which are slightly curved to indicate the round shape of the trunk, as well as interesting dots and dashes. The most important thing is to make them
randomly! Marks should be unevenly spaced, unplanned, some short, some long: as natural looking as possible. You can also "carve" a heart or your initials into a tree. In fact, some of our artists signed their paintings with initials hidden in the trees.
After the painting is dry, remove the tape by pulling it off slowly, away from the painting and flat against the board to avoid tearing the paper. You will have a lovely white border around your pretty little painting!


