Wednesday, December 06, 2006

December Craft Workshops

Here is our December workshop schedule.

After-School “Make-a-Gift” Workshop:
‘Naturally’ Framed Watercolor Painting
Monday, Dec. 4 – 2:30 to 5:30 pm ● Cost: $15.00
Create a watercolor painting, then place it in this clever picture frame made from all natural materials. A great gift for Dad, Grandpa, or a favorite uncle!

Traditional Folk Art Christmas Ornaments
Saturday, Dec. 9 – 1:00 to 5:00 pm ● Cost: $20.00
Get into the Christmas spirit! These traditional folk art ornaments were created in rural areas after the Civil War, using spare materials and a little ingenuity. Your child will re-create several of these homemade folk designs while learning about our early American folk art history.

Holiday-Themed Evergreen Wreath
Saturday, Dec. 16 – 1:00 to 4:00 pm ● Cost: $15.00
Choose a holiday theme (snow, nature, candy, stars, angels, etc.), and create a lovely embellished evergreen wreath, perfect for indoor or outdoor decorating. Bring your own evergreen cuttings and embellishments, or choose from ours.
(This workshop is for children and adults, ages 9 and up.)

Workshop fees include all supplies, materials, and a snack!For more information, contact the Blackfoot Art Center at 785-0828 or by email. You can download our Workshop Registration Form here.

Let It Snow!

We've had a bit of snow here in southeastern Idaho, but according to the kids, not enough! So, we made it snow indoors; we made these beautiful 3-D sparkly snowflakes and hung them from the ceiling. The children made more at home and hung them over their beds for a beautiful wintery snow storm.

Here's how to make your own lovely snowflakes. Start with a piece of regular white copy paper.


Cut it in half the long way. Fold up the end of one of the halves about 1/2 to 3/4 inch. Continue to fold the paper accordian style to the other end. Hold the folded paper flat and fold in half. Unfold and cut two notches along the center fold, one on each side, as shown.

Cut your design into one side of the folded paper, using curvey, pointy, and rounded cuts. Don't be afraid to cut deeply for more interesting designs, and be sure to cut off one or both corners. Try using a hole punch too. When finished cutting, fold the paper over and, using your previous cuts as a guide or a pattern, cut the other half of your folded paper. Open, and tie one end of an 18-inch piece of string around the center notches of the paper, and knot tightly. Apply glue to one side of the paper (we use glue sticks), and lay the longer length of string over the glued side (so the snow flake won't hang horizantally like a flying saucer). Fold the opposite side over, and press down. Now simply glue the bottom two sides together, forming the completed snowflake, and hang from the ceiling!

To make them sparkly, we sprayed our flakes lightly with spray glue, then sprinkled with glitter. Be sure to do this in a shallow box so you can pour the extra glitter back into the bottle. Pretty messy business, and not really vital for this project.

Note: A much larger snowflake can be made in exactly the same way from two full sheets of paper that are taped together along the short ends to make one long sheet of paper.

Saturday, October 28, 2006

November Children's Craft Workshops

We have scheduled Monday and Saturday Children's Craft Workshops throughout the month of November. Be sure to sign up early; classes are small and space is limited.

Handmade Greeting Cards
Saturday, Nov. 4 – 1:00 to 5:00 pm • Cost: $20
Learn to make uniquely personal greeting cards using a variety of materials and techniques.

Santa’s Workshop 1
Monday, Nov. 6 – 2:30 to 5:30 pm • Cost: $15
Make a unique gift for Mom, Auntie, or Grandma that she’s sure to love!

Dough Art Fun: 2-day Workshop
Saturday, Nov. 11 – 1:00 to 4:00 pm & Monday, Nov. 13 - 2:30 to 4:30 • Cost: $25
Salt dough creations will include Christmas ornaments and gifts. On Day 1 children will learn techniques and create dough art. On Day 2 they will paint and complete hardened dough art projects.

Thanksgiving Fun
Saturday, Nov. 18 – 1:00 to 5:00 pm • Cost: $20
Get your child involved in your holiday preparations! We’ll make an impressive Thanksgiving centerpiece, napkin rings, and unique place cards to dress up your holiday table.

Santa’s Workshop 2
Monday, Nov. 20 – 2:30 to 5:30 pm • Cost: $15
Decorated hinged wooden boxes – beautiful and fun to create.

Traditional Folk Art Christmas Ornaments
Saturday, Nov. 25 – 1:00 to 5:00 pm • Cost: $20
Get into the Christmas spirit! These traditional folk art ornaments were created in rural areas after the Civil War, using spare materials and a little ingenuity. Your children will re-create several of these homemade folk designs while learning about our early American folk art heritage.

Santa’s Workshop 3
Monday, Nov. 27 – 2:30 to 5:30 pm • Cost: $15
Create a watercolor painting, then frame in this clever picture frame, made from all natural materials. A great gift for Dad, an uncle, or Grandpa!

Workshop fees include all supplies, materials, and a snack!

For more information, contact the Blackfoot Art Center at 785-0828 or by email. You can download our Workshop Registration Form here.

Saturday, October 14, 2006

New for Fall! Children's Saturday Craft Workshops

Three new children's workshops have been scheduled at the Blackfoot Art Center:

New Date! Monday, October 23 - Spooky Halloween Crafts - fun Halloween-themed projects, (not scary)! 1:30-5:00 pm

Saturday, October 28 - Fun Leaf Projects for Kids - great things to do with all those beautiful fall leaves! 1:00-5:00 pm

Saturday, November 4 - Handmade Greeting Cards - we'll use a variety of art media and techniques to make our own very special greeting cards. 1:00-5:00 pm

All workshops are designed for children ages 7 to 12. Location is at the Blackfoot Art Center, and times are 1:00 to 5:00 pm unless otherwise noted. Cost includes all materials and supplies, a snack break, and lots of fun! If you would like to sign your child up for any of these workshops, please don't wait. For even more fun, bring a friend!

Classes are small and space is limited.

Cost is $27 per child. You may download and print out a workshop registration form (pdf) here, or contact us at blackfoot_artcenter@yahoo.com.

Tuesday, September 05, 2006

Homeschool Art Classes Start Mid-September!

Are you looking for quality art experiences for your homeschooler(s)? If you live in the Blackfoot area, contact us about setting up a private ongoing weekly art session for your homeschool group!

Just provide your first and second choices of days and times and we will do our best to accommodate you. If you do not have a group to meet with, we have the following homeschool sessions set up with openings available :

Monday - (reserved for all-day or half-day workshops, beginning in October)
Tuesday - 2:00 to 3:30 pm, ages 8 - 11, FULL
Wednesday - 11:30 to 1:00 pm, ages 5 - 7, two openings
Thursday - 1:00 to 2:30 pm, ages 12 - up, four openings
Friday - 10:30 am to 12 pm, FULL (afternoon is open - suggest a time for your group)

If none of these days / times work for you, or if you would like a separate time slot for your own group of five to six children, please contact us.

Homeschool art classes are similar to our summer Art Adventures series. Projects are planned according to the needs and interests of the children. Art activities might include exploration of drawing and painting media (colored pencil, watercolors, pastels, etc.) or mosaic work, collage, nature art, papier mache', holiday crafts, and mixed media.

Homeschool art sessions are five weeks long. Most will begin mid-September (right after Fair Week). Cost is $25 per child per session, and includes most materials and supplies.

To sign up for a homeschool art class, download, print, and complete our Class Registration Form (pdf), indicating the day and time you have selected. Submit with payment to the Blackfoot Art Center to secure your child's place in class. (Be sure to call first to confirm that openings are still available on your selected day and time.)

I look forward to meeting you and your homeschoolers as together we begin our adventures in art!

Sunday, August 27, 2006

Good, Old-Fashioned Play Dough!

One great open-ended art activity is good, old-fashioned play dough: a perfect example of the value of process vs. end result. Our play dough activity sessions have never produced any "end results," unless you count a plastic bag full of colorful squished up blobs of dough.

Play dough, unlike clay, is just what it says: a lovely, soft doughlike substance that you simply play with. Clay is hard and takes time to manipulate, giving the impression that it is to be made into something permanent. Oil based clay, although it lasts, is hard for young children to work with, and it smells. Self-hardening, oven-baked, and kiln hardened clays have a purpose - to design or create something that will be completed, painted or glazed, and displayed.

With play dough nothing further is expected, no end-result required. Simply give each child three or four balls of play dough, each a different color. Even the colors are just an added attraction, really. The children are far more interested in the texture of the squishy dough in their hands and between their fingers. They like to manipulate it and to see what they can do with it. I give them a plastic knife for cutting, a cardboard tube for punching holes, and a rolling pin for flattening. Then, I sit quietly at one end of the table and I play with my dough (I get some too). As I work, sometimes they watch what I do, but mostly they come up with their own playful ways of working the dough and using tools. I don't "instruct" them because I want them to explore the material themselves. You can see in these pictures that they are doing just that.

We use a wonderful recipe that takes only a few minutes to make. I make four batches, one each of red (or pinkish), yellow, blue, and green. This dough is not sticky, doesn't smell, and doesn't dry out during use. It will remain soft and flexible after several weeks if stored properly. Here is our recipe:

BETTER-THAN-STORE-BOUGHT PLAY DOUGH

1 cup flour
½ cup salt
1 cup water
1 tablespoon vegetable oil
2 tablespoon cream of tarter
Few drops of food coloring

Mix all ingredients in a pan. Cook over low heat, stirring constantly with a wooden spoon, until mixture pulls away from sides of pan and becomes a large ball. This takes just a minute. Do not over cook. Quickly remove from pan and knead on kitchen counter until smooth. This can be stored in a re-sealable bag in the refrigerator for several months. Note: Double or triple recipe to create several colors.

If you would like more great childrens' craft recipes, you are invited to get your own copy of our ebook, 75 Craft Recipes For Kids: Crafty Concoctions Your Children Will Love! All proceeds from the sale of this ebook go directly to the Blackfoot Art Center, allowing us continue to offer quality art classes and workshops, as well as step-by-step art activities right here in this weblog.

Friday, August 18, 2006

Mosaics of Beans, Seeds, and Pasta

There are many different ways to create a mosaic. With young children, the idea is still the same: provide them with an art activity that is fun and open-ended. Mosaic activity ideas might include furnishing small pre-cut paper squares (no more than one by one inch) of various colors to be glued to a piece of paper; or it might be providing three-dimensional materials to be glued to a stiff backing. These could be man-made objects such as tiles, cut linoleum, or seaglass; or natural objects such as seeds, bark, twigs, seashells, pebbles, and leaves. We decided to create three-dimensional mosaics using dried beans, seeds, and uncooked pastas; such as the one above created by five-year-old McKenzie. Our four- to six-year-olds thoroughly enjoyed this project, so your youngster may enjoy trying it too.

Materials:

Precut corrugated cardboard squares, about 8 x 8 inches each
Seeds, dried beans, and interesting macaroni products, such as:
white beans, black beans, small read beans, pinto beans, black
eyed-peas, split green peas, white rice, spaghetti, Wacky Mac
veggie-shaped pasta
Muffin tin
Meat tray, cleaned and dried
White glue poured in plastic covered container
White glue in original bottle
Water in open container
Small sponge brushes, one for each child
Moist rags (for wiping hands)
Paint smocks or old shirts
Newspapers

Preparation:

Cover table with newspaper. Set out separated seeds and dried beans in muffin tin, pour pasta into meat tray, and place white rice in a disposable cup (for pouring). Place all in center of table. Add one part water to three parts white glue in plastic containers and stir. Place on table (one can be shared by two children) with additional glue in original bottles. Place water container on table for cleaning brushes. Place a piece of cut cardboard and a sponge brush at each child’s place. Put moist rags nearby.

What to do:

1. Talk for a few minutes about the materials on the table. Name the different types of beans and seeds on the table, and talk about the various colors and the differences in size and shape, as well as the various types of macaroni shapes. Introduce “mosaics,” and talk about how can make them using various materials to “paint” pictures.

2. Demonstrate various ways to do this: You can use one type of item (such as black beans or pasta) and a line of glue to outline shapes. You can glue on spaghetti to make straight lines (long or very short). You can fill in areas with glue and a poured material such as split peas or rice. You can glue interesting items around the outer edges. As you can see, six-year-old Lindy used most of these techniques in her mosaic creation.

3. Once the child has a basic understanding of the project, put on paint smocks and let him begin to apply the glue and place the mosaic materials on his project board. Monitor the glue and the other materials. He may use too much glue or simply pour the beans in piles onto the project. Help him to think about what he is doing and remind him that the materials need to be glued on in a single layer so they will stay on when you turn the cardboard sideways (which you should help them do every so often, then re-use any fallen materials).

4. Once your child decides he is finished, make sure he has covered all of the wet glue with mosaic materials. Allow the project to dry. If he would like, let your child select another sheet of cardboard to make another mosaic.

5. Once the mosaic is completely dry, it can be sprayed or painted with a clear glossy acrylic finish.

Saturday, August 05, 2006

Pop-Up Book Workshop and More!

Make a Pop-Up Book, our last children's one-day summer workshop, is just around the corner. Scheduled for Monday, August 14, this workshop will be great fun for kids interested in making their very own bound pop-up book. They will learn several different paper-folding techniques, as well as other interactive methods to surprise and involve the reader. They'll develop a theme or a story-line, build the pop-ups into the book design, and bind the completed book.

This workshop will take place on August 14 from 1 to 5 pm for kids age 7 and up, and will include an energy snack and all supplies and materials. Cost is only $27.00!

Click here to download our Summer 2006 Class Schedule for information about our final session of 2006 summer classes and workshops. This is a PDF file, so you'll need Acrobat Reader to download it. Our Class Registration Form can also be downloaded and printed out. Simply complete and mail or bring it to the Blackfoot Art Center with your class or workshop tuitions.

Session 3 classes begin the week of August 7, so hurry!

Little Painters

Children love to paint. Painting is messy, adventurous, and bold. One uses a brush instead of a fine-pointed writing instrument; strokes are broad and free. In fact, it's the process of painting that is important for young children; it's the playfulness; the motion of the brush dabbing and swirling pigment. The child may attempt to paint a picture, or she may just play with color and design. Painting is great fun!

The availability of easels, smocks, paint palettes, and a variety of brushes allows young children to recognize that they are viewed as trusted, capable artists. At the Blackfoot Art Center, here is how we prepare an open-ended painting activity for four- to six-year-olds:

Materials:

Heavy sketching, drawing or watercolor paper 11 x 14 or larger
Table or child height floor easle
Flat, smooth board such as masonite or sanded plywood (larger than the paper)
Masking tape
Tempera paints, each color in its own covered plastic container
Palettes (we use old pie tins)
Assorted brushes
Large water container
Plastic knives (palette knives)
Paint smock
Paper towels
Newspaper

What to do:

Spread newspapers on the table. Place water container on the table.
Tape all four sides of the paper to the board. (The paper will wrinkle when painted, but will flatten back out when dry.) Place the board on the easle, which should be set at eye-level when the child is standing.

Scoop the primary paint colors (red, yellow, and blue) onto the child's palette, and briefly explain how to create new colors by mixing them together using the plastic knife or a brush. Also show the child how to clean the paint brush between colors and dab off excess water on a folded paper towel. Provide any additional colors that the child requests, such as purple, orange, or green.

Now, just let your child paint!

The painting will likely start out timidly with small, distinct areas of color here and there. Then, as the child become more adventurous, colors will begin to fill the paper in great strokes and swirls. This is often accompanied by verbal cues, such as "Here's some green!" or "Whoa, look at all this pink!." Eventually, most of the colors will likely be blended together to make a nice army green.

Most of your youngster's first works will consist of random strokes of color that represent the playful experience of painting, such as in these pieces by two 4-year-olds, Billy and McKenzie. Then at a certain point (only the child knows exactly when), the painting will be "done." If the child wants to try another, carefully remove the completed work from the board and set it aside to dry. Wipe the board down, and tape on another piece of paper. This time your child may do exactly the same type of thing, or he may attempt to paint apply color in a specific design or even a representational piece.

Below, 4-year-old Erik's first painting (left) was obviously an experiment in playful design and color-mixing. The second painting (center) was a bit more deliberate in design and color selection. Erik's final painting illustrates planning in both the use of color and subject representation. In fact, he entitled this piece "Beehive in a Tree."


Isn't it amazing what young children can do when given encouragement and the proper materials?

Monday, July 17, 2006

Open-Ended Art for Young Children

Besides being great fun for young children, quality art experiences are essential to healthy creative and mental growth. When presented properly, pre-school art experiences provide multiple opportunities to explore art processes and manipulate media, all while having fun. Freely investigating both new and familiar materials is always encouraged. This can include squishing, pounding, pouring, splattering, squeezing, swirling, stacking, cutting, rolling, scribbling, chopping, and pasting.

Pre-school art can be a messy business!

It is important to understand that young children are far more interested in the art process than in the end result. In fact, the completed "work of art" is often forgotten by the end of the art session. The highlight of the class session may have been cutting up paper to bits, pounding and rolling clay, or swirling multiple colors of paint into a lovely army green.

Art for preschoolers is about playful exploration. Pre-designed, all-alike projects in which each child is expected to cut on - or color within - the lines, paste specific parts together, and produce an expected end result do not allow for playful exploration and are not truly "art" for the young child. In fact, when do pre-designed all-alike projects promote creativity and playful exploration for anyone?

That's why we provide open-ended art projects for our young students at the Blackfoot Art Center. At the beginning of each class session, the children are introduced to the medium and given minimal instructions, such as how to mix paint colors on their palettes and clean their brushes, or how to use the glue sticks to attach paper shapes to a collage. They are not expected to "paint a house" or work around a particular theme unless they want to. They are encouraged to explore the materials, play with them, and, above all else, have fun!

In the first photo above, four-year-old Billy is working on a collage. The children were given pre-cut shapes of construction paper, randomly cut photos from magazines, scissors (for more cutting), a large sheet of heavy white paper, and glue sticks. They first explored the materials, often cutting up the shapes into "better" ones. They then collected the shapes and picture cutouts they liked best, and moved them around on the paper. (This was play, of course, like doing a puzzle.) Finally, with just a bit of prompting, they began the task of gluing their shapes onto the paper.

In these two collages (created by four-year-olds), we can see the playful nature of the creative process as well as the inherent ability of young children to create a balanced composition.

To sign your child up for an art exploration class, take a look at our Summer 2006 Class Schedule (PDF). Space is still available, and you may sign up mid-session for most children's classes (tuition will be pro-rated). You can download our Class Registration Form here (PDF). Simply print it out, complete it, and mail with class tuition to the Blackfoot Art Center.

Sunday, June 25, 2006

Paint a WILD Animal

Children love to paint. They also love to look at, learn about, and draw animals. So why not paint their favorite wild animals? Our Art Adventurists loved this project, and the painted and stamped "frames" really gave their pieces a nice finished look.

To the right are two paintings of a tiger. Neither was drawn first; the children just dove right in and painted, with spectacular results. Don't you agree?

"Tiger" by 8-year-old George,
(above) and "Smiling Tiger,"
by 7-year-old Kelly

Paint Wild Animals in Tempera

Materials:

Heavy sketch paper, watercolor paper, or other appropriate paper, 11 x 14 or larger
Tempera paints, each color in its own covered plastic container
Assorted brushes
Assorted foam stamps (small - you can make your own)
Old pie tins (palettes)
Large water containers
Plastic knives (palette knives)
Paint smock
Paper towels
Newspapers
Pencils
Books / magazines with good color pictures (art or photos) of wild animals (Zoo Books are great)
A prepared stack of good color photographs of wild animals in their natural surroundings, cut from National Geographic, old calendars, etc.
Sample animal painting with stamped frame (if you have one)

Preparation:

Cover table with newspapers. Set out covered paints, brushes, and filled water containers. Soft margerine tubs are great for paint and water. Set out paper on table and photos for children to look through. Display the sample painting.

What to do:

1) Talk about wild animals and your child's favorites. Look through books and /or magazines at wild animals and how they are depicted.

2) Now look through the photos and have your child choose an animal that he would like to paint. (Use individual photos instead of books or magazines so that if paint is splattered on them it won't matter - plus photo cutouts are easier to work with than an open book.) Explain that the photo is a reference only; that is, its purpose is to help him remember what the animal looks like. He needn’t copy it exactly; in fact he may change the background, the number of animals, or anything else he wishes.

"Lion Cub" by 7-year-old Ashley

3) Put on painting smock.

4) Two rules for painting: Cover the paper surface completely with paint (don’t leave large white areas unpainted); and paint the frame last. (Show sample painting as an example.)

5) Here is the basic procedure for painting:

a) Visualize your composition on the paper first; pencil it in if you like.
b) Decide what colors you will need. Remember, you will be mixing your own colors as needed.
c) Scoop small amounts of basic paint colors from paint containers onto your pie plate palette with a plastic knife.
d) Wipe knife with moist paper towel between each color. That way you will not contaminate the other colors.
e) Mix the colors you need for your painting on your palette using your knife or your brush.
f) While painting, clean your brushes often in the water containers. Don’t let paint dry in brushes. Use paper towels to remove excess water from brushes.
g) Use the blow dryer to quickly dry areas that you want to paint over with contrasting details.

6) After you have completed your painting and washed out your brushes, use a wide (1/2” to 1”) brush and carefully paint a border around the outside of the painting, using a color that complements your painting.

7) After it dries, select a foam stamp that goes well with the theme of your painting (African safari? Woods? Prairie? Beach?) You can easily make your own foam stamps by cutting them from craft foam. Cut out simple designs like zigzags, crescents, or basic shapes like triangles, stars, and dots.

8) Chose a paint color that stands out from your frame color and spread thinly on the newspaper. LIGHTLY press the stamper into the paint, test on clean newspaper a few times, then stamp your frame. You can do this several times before reloading with paint. Leave equal amounts of space between each stamped design.

9) Allow to dry, then display on your wall!

Saturday, June 17, 2006

Paint a Colorful Fat Fish!

In the previous post, you may have noticed one of our little artists working hard on her "fat fish." This project was a big hit with the younger crowd in our Art is Fun! class. It's fun to construct this big fat fish, but even more fun to paint it. Best of all, when you hang it from the ceiling, it "swims" through the ocean-air (especially with a good breeze). One thing children really like this fish is the size - nearly two feet from the mouth to the tip of the tail!

The fabulous fish above was designed and painted by 6-year-old Lindy.

This project does take a lot of preparation, but little ones enjoy doing their jobs: stuffing and especially painting this big fat fish.

How to Make Colorful Fat Fish

Materials:

Newspaper or large roll or sheets of plain newsprint
Colored construction paper
White glue
Stapler
Tempera paints in separate plastic containers, ready to use
Assorted brushes
Paint smocks
Masking tape
Old pie tins (palettes)
Large water containers
Plastic knives (palette knives)
Paper towels
Newspapers for table
Felt tipped markers
Pictures or paintings of colorful tropical fish
Completed Fat Fish sample (go ahead, make one!)

Four-year-old Erik used bold shapes and colors in his lovely tropical fish design, above.

What to do:

Preparation (to make one fish) - Add a small amount of water to some white glue. Fold 2 single sheets of newspaper or newsprint (cut to newspaper size) in half and glue halves together. Use a one-inch paint brush to spread glue, for best results. Allow to dry. Using a black marker, draw a large fish shape on one of the above folded and glued sheets. Layer it on top of the other glued sheet, and cut out the fish shape. Glue the edges of the two fish pieces together, leaving five or six inches open along the top. Allow to dry. Tear several sheets of newspaper into small (6 x 6 inch) squares for the children to crumple for use as stuffing. Accordion pleat two lengths of construction paper, four and six inches wide, to cut up and use as fins and tails.Cover table with newspapers. Set out paints, brushes, and filled water containers.

1) Talk with your child about the different kinds of fish and share pictures and/or paintings of colorful fish. Your fat fish sample could be hanging from the ceiling near the table.

2) First your child will stuff the fish. While you check the glued edges and staple together any gaps, have your child loosely crumple newspaper squares, then carefully stuff the crumpled newspaper into the fish. Be sure to stuff newspaper into the head and tail areas. When the fish is nice and fat, staple the opening closed.

3) Now, staple the six-inch accordian pleat to the fish, creating a "fan" tail. Cut the other pleated paper in half and staple a "fin" to the top and another to the bottom of the fish.

4) Time to put on a paint smock and paint that fish! Encourage your child to think about colors and patterns and scales. Refer to the fish sample and pictures of fish.

5) Pour various colors of paint into the pie tin palettes. Show your child how to clean brushes between colors, and encourage him/her to mix new colors. Will the fish have stripes, spots, or wavy patterns? Remember to paint the gills, eyes, and mouth. You can cut out an eye from construction paper to glue to the fish when the painting is done if desired.

6) While the fish dries, your child can ad stripes or spots to the fins and tails to match the body of the fish. Your child can also paint new colors on top of old once the first layer is dry. Use a blow drier to speed up the drying process if necessary.

7) Once it is completely dry, punch two holes in the top of the fish and hang from the ceiling using string or fishing line. Hang two or three together for a spectacular school of beautiful, drifting fish!

Here's the sample fat fish that I made before class: (Don't laugh! The kids loved it!)

REVISED Summer 2006 Class Schedule

We've had quite a busy week!

Session I of the Summer 2006 class schedule began Monday, and nearly every Session I class has filled! Our children's art classes are proving to be so popular, we have decided to add another children's class that will continue through all three summer sessions. We have also made some changes to our photography class schedule, so be sure to take a look (below) if you are interested in these classes.

Sessions 2 and 3 classes are filling up quickly, so please get your registration materials in as soon as possible to reserve a space. Classes sizes are limited to six students. Feel free to contact us about space availability; give us a call or email us at blackfoot_artcenter@yahoo.com.

Class Schedule Changes:
Note: you will find all of these changes on our updated Summer 2006 Class Schedule(pdf).

It's a Snap! Basic Photography 1 has been moved from Session 1 to Session 2.
Days and times remain the same; Tuesdays, 3:00-4:15 pm. (kids 8 and up)
It's a Snap! Basic Photography 2 has been moved from Session 2 to Session 3.
Days and times remain the same; Tuesdays, 3:00-4:15 pm. (kids 8 and up)
Creative Photography 1 has been moved from Session 1 to Session 2.
Days and times remain the same; Saturdays, 10:30-12:00 pm (teens/adults 13 and up)
Creative Photography 2 has been moved from Session 2 to Session 3.
Days and times remain the same; Saturdays, 10:30-12:00 pm (teens/adults 13 and up)

Class Schedule Additions:

New! Our Art Adventures! classes have proven so popular, we've decided to extend each Art Adventures! class to 1-1/2 hours, and we've added a new Art Adventures! class to our summer schedule. The new class will be held on Fridays from 1:00 to 2:30 pm. This class will run every four weeks throughout the summer beginning June 23, 2006. (Three weeks in Session I) Ages 7-12.

Workshop Schedule Changes:

Easier-Than-Tole-Painting Workshop time changed from 10:00 am-2:00 pm to 1:00-5:00 pm. Date remains the same; Saturday, August 26.

Friday, June 02, 2006

Poster Paint Potato Prints

Remember making vegetable prints? I do. I always found the potato to be the best vegetable to work with because the cut suface is large enough to actually cut a nice design into. (Carrots also work, but they are tougher to cut, and have narrower work surface.) If the potato is left unpeeled, it's not so slippery, so it's easier for little fingers to hold onto while cutting and printing.

How to Make Potato Prints

Materials:

Potatoes with skins
Poster or tempera paints
Old pie tins or other suitable paint containers
Old plastic margerine tubs (for water)
Rag or paper towels
Drawing paper / construction paper
Pencils
Small plastic knives, sharp knife
Paint smocks or old shirts
Newspapers

What to do:

1. Cut potatoes in halves or thirds.

2. Draw desired design onto potato with the pencil.

3. Young children can carve simple designs out with the small plastic knives and a little help; but if more detail is preferred, an adult needs to cut around the pencil outline.

4. On newspaper-covered table, pour paint into pie tins, creating a thin layer of each color. Add a bit of water if the paint is thick; it should be like melted ice cream. (This is a good time to mix colors also; mix white and red to make pink, etc.)

5. Press potato design lightly into paint and firmly press onto paper for impression. You'll be able to make several impressions before adding more paint. Practice a couple of times on newspapers to get the feel for how much paint you want on your print. To accomplish a textured effect try letting layers dry and adding prints on top in different colors.

6. To switch colors, teach the children to wash off the potato in the sink or tub of water and blot on the rag or paper towels before using a new color.

7. Experiment with prints on colored construction paper. You can get some really lovely designs and color combinations.

8. What can you make from the finished prints once they are dry? Greeting cards? Wrapping paper? Book covers? Remember, you can cut up your designs and use them to decorate other projects.

If you are interested in signing up for summer classes at the Art Center, scroll down to the Summer 2006 Class Schedule or click here.

Saturday, May 27, 2006

Paper Weaving Fun!

This week our Art Adventurists made colorful paper weavings. This project involoves a lot of cutting, which suited these kids just fine! Weaving skills can be fun to learn, although challenging for children younger than six or so. It's not the "over and under" concept that's so difficult, it's the "under and over" for the second row that's tricky. Our group ranged in age from 3 to 11, so the youngest ones needed help with their weaving, but all were able to complete this project. The children enjoyed picking out various color combinations, and quickly learned that cutting crazy (instead of straight) slits to weave through would result in some interesting, almost vibrating designs (remember the "psychedelic" posters of the '70s?).

I encouraged the children to select colors that are opposites (complementary) or near opposites for the best effect. Also, remind them to continuously slide their weaving strips together (until they touch) after they have been woven though the slits of the second sheet. Slide, slide slide!

Be prepared to allow the kids to make more than one paper weaving - they'll want to experiment with bolder colors and even bolder cuts for more interesting designs.

How to Make Paper Weavings

Materials:

Colored Construction Paper (9 X 12 is fine, 12 X 18 is better)
Scissors
Glue Sticks

What to do:

1) Select two sheets of construction paper of the same size and different colors.

2) Cut one sheet into strips (the short way) about 1 inch wide (if they vary in width, that's okay.)

3) Fold the other sheet in half the short way, then cut slits into the paper started at the folded side and stopping about one inch from the opposite end of the paper. Cuts don't have to be straight of even, in fact curvy and angular cuts are encouraged.

4) Once it is full of slits, unfold the paper, carefully flatten it out, and weave the paper strips in and out of the slits, over and under, sliding them over to one side before adding the next. You will have a couple strips left over.

5) Glue down the ends of the paper strips for a neat, finished appearance. Now you can hang your paper weaving on the wall, laminate it for use as a place mat, or (?)

By the way, I posted the instructions for our last project - Crazy Tops - on my Homeschooling Helper weblog as an example of what we are doing at the Blackfoot Art Center. Go ahead and take a look - your children will have fun while learning about light and color.

Sunday, May 21, 2006

Summer 2006 Class Schedule

It's not to late to start planning your summer acitivities, so why not take an art class? If you live in the Blackfoot area, you can find some great ways to "get creative" at the new Blackfoot Art Center. Our Summer Sessions will include plenty of great classes for children such as art exploration classes, nature drawing, photography, and creative writing. Also, don't miss our exciting kids' workshops. We'll be building kites, learning watercolor techniques, and making pop-up books! Space is limited, so register early. There will be three class sessions, each four weeks long, beginning the week of June 12, and ending September 2.

We also have classes for adults, including beginning drawing, pastel painting, and photography. Check out class descriptions, dates, times and sessions by downloading our current Summer 2006 Class Schedule. This is a PDF file, so you'll need Adobe Reader to download it. If you would like to register for a class, please download the Class Registration Form (PDF). You'll need a separate registration form for each participant, so make as many copies as you need.

Would your group like a class scheduled just for you? Let us know what you are looking for, what you would like to learn, and when you can meet. Contact Sandra at 208-785-0828, or e-mail us at blackfoot_artcenter@yahoo.com. See our Summer 2006 Class Schedule for more information. You may also download our Summer 2006 Class Flyer and make a few copies to post or to give to your friends (and their little artists). Remember, classes start the week of June 12 and class sizes are small, so please register early.

Here is a list of art classes being offered during the three upcoming Summer 2006 sessions. Use the above links to download detailed class descriptions, information, and registration forms.

Session 1 - June 12 through July 6
Session 2 - July 10 through August 6
Session 3 - August 7 through September 2

Art Adventures! Tuesdays, 1:00 to 2:15 PM - Sessions 1, 3
Ages 7 - 12: Art exploration utilizing a variety of art forms and media. Activities include both 2- and 3-dimensional projects.
$3.00 materials fee plus $21.00 tuition for three week session (Session 1)
$3.00 materials fee plus $24.00 tuition for four week session (Session 3)

Nature Drawing! Tuesdays, 1:00 to 2:15 PM - Session 2
Ages 8 - 14: This class will provide opportunities to enhance observation skills through the careful study and depiction of natural objects, usually in an outdoor setting.
$24.00 tuition for four week session

It's a Snap! Basic Photography 1. Tuesdays, 3:00 to 4:15 PM - Sessions 1, 3
Ages 8 - up: Students will learn better approaches to better photography using a digital, disposable, or 35mm camera. In-class peer evaluations of weekly work.
$18.00 tuition for three week session (Session 1)
$24.oo tuition for four week session (Session 3)

It's a Snap! Basic Photography 2. Tuesdays, 3:00 to 4:15 PM - Session 2
Ages 8 - up: Continuing photography class that goes beyond the basics learned in Basic Photo1. Students will learn more refined photography techniques, and complete more challenging weekly outside assignments.
$24.00 tuition for four week session

Art is Fun! Wednesdays, 1:00 to 2:00 PM - Sessions 1, 3
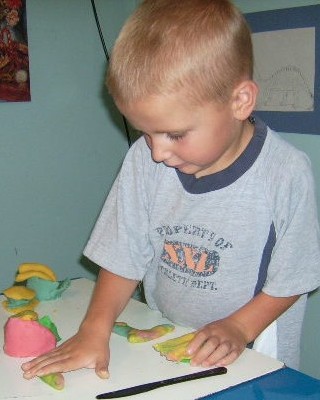
Ages 4 - 6: Unique arts and crafts activities for 4- to 6-year olds. This class is about creative fun as we playfully explore a variety of art media.
$3.00 materials fee plus $24.00 tuition for four week session

Craft It! Wednesdays, 1:00 to 2:00 PM - Session 2
Ages 5 - 8: A hands-on approach to explorating new art forms and interesting materials, while encouraging creativity and experimentation.
$3.00 materials fee plus $24.00 tuition for four week session

Let's Draw! Wednesdays, 2:30 to 3:30 PM - Sessions 2, 3
Ages 5 - 8: Using the five elements of shape, even young children can learn to draw what they see. Includes warm-up activities and skill-building drawing projects.
$25.00 tuition for four week session

Learn to Draw! Wednesdays, 4:00 to 5:30 PM - Sessions 1, 3
Ages 9 - 15: Students will be encouraged to develop their own personnal drawing styles as they learn to develop better observational skills and practice newly discovered drawing techniques.
$30.00 tuition for four week session

Creative Writing! Thursdays, 1:00 to 2:15 PM - Sessions 2, 3
Ages 9 - up: Young people who love to write will be motivated to write more about the things that really matter to them. Word games, unique writing prompts, and fun writing ideas and projects. At-home assignments that can be shared in class.
$25.00 tuition for four week session

Art Adventures; Just for Homeschoolers
Ages 5 - 12: Ongoing homeschool art explorations. Contact us about setting up a day and time for your homeschool group.
$25.00 per 5 week session

Creative Photography 1. Saturdays, 10:30 AM to 12:00 PM - Session 1
Adults (ages 13 - up): Using a digital, disposable, or 35mm camera, students will learn creative techniques to taking better pictures that will improve photographic skills. Weekly assignments outside of class.
$25.00 tuition for four week session

Creative Photography 2. Saturdays, 10:30 AM to 12 PM - Session 2
Adults (ages 13 - up): Continuing class, this time focusing on the creative and artistic aspects of photography. Weekly outside assignments.
$25.00 tuition for four week session

Adults Learn to Draw. Thursdays 7:00 to 9:00 PM - Special Session
Session dates are May 18 to June 15 and June 22 to July 20 (10 weeks total)
Adults (ages 13 - up): Basic drawing course designed for adults. Learn to draw what you actually see through various exercises and drawing projects. Some weekly at-home assignments, no drawing experience required.
$40.00 tuition for 5 week session.

Introduction to Pastel Painting. Thursdays, 7:00 to 9:00 PM - Special Session
August 3 to Agust 31 (5 weeks)
Students will discover and experience the pastel medium through demonstration, creative experimentation, and individual interpretations of various subjects using medium and soft pastels.
$5.00 materials fee plus $40.00 tuition for four week session
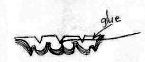
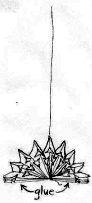
WORKSHOPS

Let's Paint the Sky! Monday, June 19, 1:00 to 5:00 PM
Ages 8 - up: We'll build and fly three different kites in this afternoon kite-making workshop. Bring at least one roll of kitestring. Snack break included.
$3.00 materials fee plus $24 workshop tuition fee

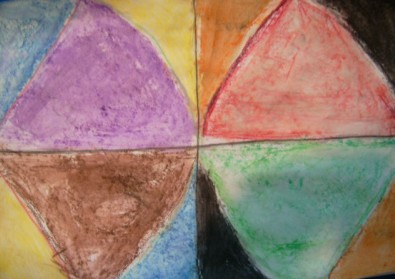
Wonderful Watercolor! Monday, July 17, 1:00 to 5:00 PM
Ages 8 - up: A hands-on try-it! class where children will be re-introduced to the watercolor medium and how to achieve satisfying results through the use of quality paints, brushes, and papers. Plein-aire (outdoor) painting and snack break included.
$3.00 materials fee plus $24 workshop tuition fee

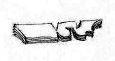
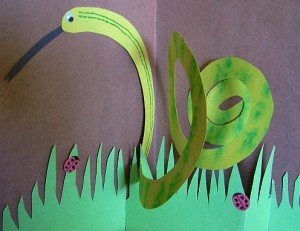
Make a Pop-Up Book! Monday, August 14, 1:00 - 5:00 PM
Ages 8 - up: Paper folding magic will turn a simple made-up story into a real page-turner!
Snack break included.
$3.00 materials fee plus $24 workshop tuition fee

Easier-Than-Tole-Painting Workshop. Saturday, August 26, 10:00 AM to 2:00 PM
Adults (ages 13 - up): Bring an unfinished wood item or a clay pot and learn how to decorate it without using brushes. We'll create foam rubber stamps uniquely designed by YOU. You'll love these techniques, and the results are lovely! Bring a sack lunch if desired.
$40.00 - includes all materials except item to be painted.

Please see complete class descriptions, registration and cancellation policies, and sibling discount details by downloading the Class Schedule - 2006 Class Sessions. Download Class Registration Form here.

Wednesday, May 17, 2006

Let's Go (Make and) Fly a Kite!

We've had a windy spring here in Blackfoot, so last week our first Art Adventures homeschool class made colorful Dutch kites. These kites require nothing more than a piece of paper, a glue stick, scissors, and string. It also helps if you have a broom lying around...

We used the directions for the Dutch kite in Margaret Greger's Kites for Everyone. These kites are sturdy, steady fliers and can be made from just about any type of paper... even brown grocery bags with newspaper tails! For a first Dutch kite, start with a 8 1/2" X 11" sheet of regular paper of any color (try Astro-Brites, or Hammermill colors). We used plain white paper so the children could decorate them with colored markers. The only directions for decorating their kites are to go for a symmetrical design, and to fill in all or most of the white space.

Then simply follow the directions at the above link to construct the kite. Children under nine or so can do some of the folding and gluing, but will need help attaching the bridle (which is tied to one-inch bits of broom straw, or broken toothpicks for larger Dutch kites). We used brightly colored strips cut from newspaper ads for the tails. You can also use a long strip cut from a plastic grocery bag. Note: I recommend that you eliminate Step 8 in Greger's instructions. The kite seems to fly better when the top two corners (and the artwork!) are left intact.

Create a small loop in the bridle of the finished kite, and attach a length of kite string through the loop. Wind the string around a small piece of heavy cardboard, and go fly your kite! No running is required; simply let the wind carry it up. (The kids were so excited - It flies! It flies!)Now , try making more Dutch kites of different sizes (same proportions). Use heavier paper for larger kites, tissue paper for tiny kites.

For another easy one-sheet paper kite, try the 20-20-20 Kite (20 kids, 20 kites, in 20 minutes).

Now, go fly a kite!

Monday, May 15, 2006

Ten Great Reasons to Take an Art Class

1. Art teaches self-esteem.
2. Art aids the development of physical coordination.
3. Art stimulates connections between rational and abstract thinking.
4. Art teaches problem-solving and provides safe decision-making opportunities.
5. Art develops good work habits and responsibility.
6. Art provides a means of non-verbal communication and expression.
7. Art promotes self-awareness and understanding.
8. Art heightens aesthetic awareness and sensitivity.
9. Art teaches respect for individuality.
10. Creating art generates joy.

We are in the process of completing our Summer 2006 Class Schedule, which will consist of three - four week sessions. Kids' classes will include fun art projects, beginning drawing, nature drawing, creative writing, photography, and some exciting workshops. Adults will choose from drawing, pastel painting, creative photography, and private group instruction.

IMPORTANT NOTICE!
We have made an adjustment to our current adult drawing class schedule. This 5-week class will start on Thursday, May 18, from 7 to 9 PM. If you would like to learn to draw, there is limited space available in this class. Use the following link to download more information and a registration form (this is a PDF, so you'll need Adobe Acrobat Reader to view it).
NOTE: If you are unable to attend the first class session, you may still sign up and complete the first lesson at home. (Let us know upon sign up and you will receive complete Lesson I instructions.)

Sunday, April 16, 2006

What is the Blackfoot Art Center?

Welcome to the Blackfoot Art Center weblog! The Art Center is located in the community of Blackfoot in southeastern Idaho, just between Pocatello and Idaho Falls. We are not open quite yet, but plan to begin our first session on the week of May 1, 2006 with six terrific art classes for ages four and up. Private lessons and special group classes are also available.

The purpose of our blog is to keep you abreast of what's going on at the Blackfoot Art Center... what classes are currently being offered, what kinds of projects students are working on, and lesson ideas that you may be able to use with your own children or students. We will regularly feature student work here, so remember to bookmark us and check back often! If you are a homeschooling parent without access to outside fine arts instruction, the lesson ideas and resources presented here may be of great value to you.

Classes offered during our first session will be Art is Fun! - an introduction to art for children ages 4-6; Learn to Draw! - two classes for children 4-8 and 9-12; Art Adventures! - two classes for ages 6-9 and 10-14; and finally, an introductory drawing class for teens and adults. If you live in the Blackfoot area and are interested in checking out the details and registering for one or more classes, you are welcome to download our current Class Schedule and Registration Forms (you'll need Adobe Acrobat Reader to download it). If you prefer html format, click here. After downloading and printing, simply fill out the registration form and mail or drop it by with your payment. Remember, classes start May 2!

Also, feel free to download and print out our Blackfoot Art Center Grand Opening informational flyer (this is also .pdf ). You may make unlimited copies to distribute to your group.

Again, welcome to the Blackfoot Art Center! We hope you'll join us in our quest to become more creatively inspired as we explore and experience the visual arts. For more information, please email us at blackfoot_artcenter@yahoo.com or call 208-785-0828.

*******************************************
Friday, April 28, 2006

REGISTRATION IS STILL OPEN!
There is still room in all classes, but space is limited. You can get your name on a class roster by sending an email with the name and age (if under 18) of the participant; and the name of the class, day, and time. We will confirm via reply email ASAP. Then mail your registration materials and payment (or use PayPal, below).

We will hold your place until the day of the first class. By prior arrangement only (phone or email), you may bring payment with registration materials to the first class.

USE PAYPAL!
For your convenience, you may pay your registration fees through PayPal! Simply log onto your PayPal account, click the "Send Money" tab, and enter blackfoot_artcenter@yahoo.com as the recipient's email. Enter the amount you are paying, the category "Service," the subject "Art Center Class" (or something similar), and include the participant's name, the class, and the day and times of the class in the message. Click "Continue," check over your information, and click "Send Money." Once completed, you can simply bring your registration forms with you on the first day of class.