Thursday, August 16, 2018

Mosaic Makers!!


For our final week of ART Camp, we made mosaics!

This is one of my favorite all time projects, and I just love sharing the process with our young artists!


We built mosaics both large and small. We started with this little pocket mirror so we could learn how to design, glue, and grout. These were tiled on both sides. Abbi also made a drawstring pouch for hers. Here are the front and back views of her pocket mirror.


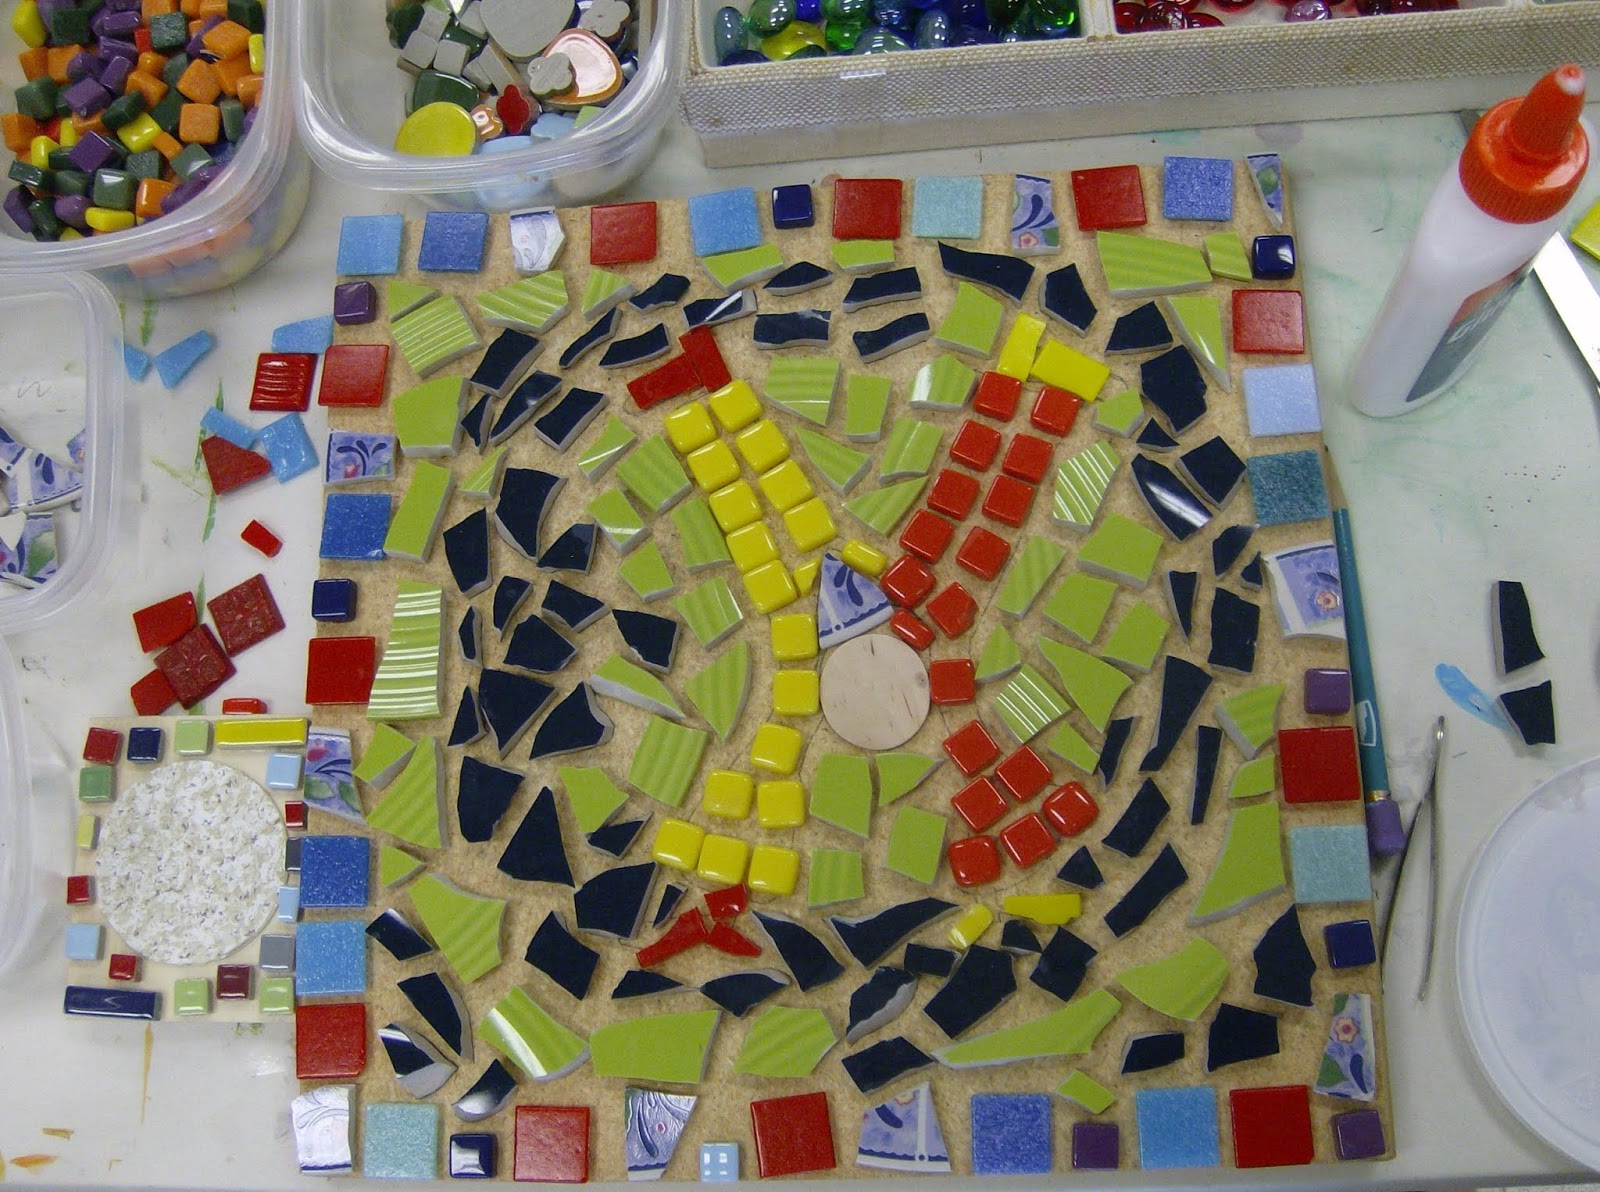
Next, we drew a simple design on a larger piece of wood and filled it in with tiles and broken ceramic pieces, such as broken china and dinner plates. 


We could also choose seashells, beads, acrylic marbles, wood shapes, and lots of other things. 


This picture shows part of our workspace.


We glued everything down and let it all dry overnight.  


After the glue was dried, we grouted the mosaic with plaster of Paris. We mixed only a little at a time because it hardens very quickly. We spread it all over the mosaic with a palette knife and then a rubber spatula to get the grout into all the cracks.


Then we waited about 20 minutes for it to set. The next step was to wipe off the excess grout with a damp sponge to make sure we could see all of the tiles.


After another 24 hours, it was time to wipe the whole thing with a soft clean rag and make it shine! Abbi also added a little clown face to her cartwheeling clown. She could paint the edges of the mosaic too, but we ran out of time. (She'll probably do that at home.)


Sunday, August 12, 2018

Painted Butterflies


This week's Thursday and Friday afternoon art class kids painted these amazing Winged Wonders!

This project provided practice with symmetry, design planning, and effective use of color. 


We first looked at a variety of butterfly resource pictures - most of ours are large calendar photos. We examined the wing shapes, patterns, and colors; and we observed the bodies, heads, eyes, and antennae.


Then we used a black crayon or oil pastel to trace a craft stick in the center of a piece of 15" x 18" heavy white paper (smaller for younger kids). Then we drew the top two wings - BIG! 


 Some still came out very small, so we made them bigger and used the smaller wing shapes as part of the wing patterns. We added the bottom wings, starting at the bottom edge of the top wings because they overlap. 


We added patterns and designs within the wings, working hard to make our shapes symmetrical with those on the opposite wing.
Then we painted them using cake temperas.


After the butterfly was completed, we painted our background with colors that contrasted the butterfly colors. For example, if our butterfly was mostly purple, our background would be mostly yellow, because it is on the opposite side of the color wheel. 


We used liquid tempera for this step.


Next we outlined the entire butterfly with black tempera using a detail brush. We also added antennae and any other details.


Then, if necessary, we dried the painting with a blow dryer and as the last step, we added glitter paint! 


All done!


This is a great art project for any elementary art student! Our class groups included young artists ages 4 to 12 and they all handled the project beautifully according to their own experience and abilities.

Our thanks to Deep Space Sparkle for this cool lesson idea.

Saturday, August 11, 2018

Bug Collections


We made Bug Collections!


Our Budding Artists made bugs and put them in a jar.

First we drew a jar. We put holes in the lid so the bugs could breathe. 

Then we added the bugs. We glued on paper shapes and used markers for the details. Then we cut out the jar and glued it to a piece of construction paper. 


The afternoon camp created 3-D bugs out of paper, wire, felt, tiny pompoms, pipe cleaners, recycled materials, beads, and anything else we could find to make them look realistic. 


Our bugs did not have to be models of real bugs. In fact, we made all of them up and named each one.


We made a display box for our bugs (it was actually an old cereal box but don't tell anyone). We placed a thin sheet of p\foam in the bottom and carefully arranged our bugs. The we straight pins to tack them down.


Then we invented names by looking at the physical characteristics of each bug (like black and yellow stripes of a Tiger Swallowtail) and we glued on name labels.  


This is a Whacky-Eyed Fly.


This was a super-fun S.T.E.A.M. MakerSpace project!

Friday, August 10, 2018

Winged Wonders!


We created a variety of flying insects during  "Winged Wonders" week. 


First, we learned about Insect Symmetry to understand and create insect anatomy.


We folded our paper down the middle and, using an black oil pastel, we drew one half of the head (and eyes and antennae) along the fold at the top. Then we drew one half of the thorax below the head and one half of the abdomen. We added three legs and a few interior patterns, then we folded the paper in half again with the drawing to the inside. 


We rubbed the folded paper all over allowing the pressure and heat of our hands to transfer some of the oil pastel drawing to the other half. Then we opened in and went over the lines one more time with the oil pastel. Then we painted our symmetrical insect and the background with tempera paint, and added a few acrylic glitter paint dots with the tip of a paintbrush handle. 


Next, we created these amazing dragonflies! 


The basic shape was first sketched with pencil to ensure proper placement on the page. Then it was redrawn with a fine point (or ultra-fine point) black Sharpie, and texture was added to the head, thorax, and abdomen.


Now it was time for the artist to add creative forms and patterns to the wings. They could be simple checkerboard patterns, wavy lines, zigzags, or Zentangles. Or, they could be complex realistic patterns like those found in dragonfly photo images.


Here is the completed inked dragonfly. 

Lastly, we added watercolor. We used wet-on-wet for most of the painting, remembering that Sharpies will not run or smudge. We also added a little salt for texture (and because we like it.)

As an option, a bit of iridescent paint can be added to the eyes, wings, or body. Or the whole dragonfly!

Dragonfly, watercolor and ink, by Abbigail A.

Tuesday, August 07, 2018

A Tropical Island Sunset

This week we painted a tropical beach scene at sunset. 


We used soft pastels to cover the paper from top to center (the horizon line) with sunset colors and then reflective colors to the bottom of the paper. We learned that laying in the color works best with the pastels lying flat instead of using the tips.


Next, we poured white tempera paint into a bowl, dipped a finger into the paint, and smeared it back and forth over the soft pastels to blend the colors and create a lovely sunset-lit sky and its reflection in the water. 


After the paint dried, we sketched in a simple tropical scene with vine charcoal - just the landscape shapes in the background and the tree shapes. (Our braver artists skipped the preliminary sketch.) Then we filled in the shapes with thick black tempera paint, adding the palm tree fronds and a flock of birds with slightly thinned tempera.


Here are a few more that we did in an earlier summer art camp:

My sample

This is an expanded version of an Art for Kids: Ocean Scenes painting idea, in which black cutouts are used for the silhouettes (probably an easier option for younger children).

Sunday, August 05, 2018

Shimmering Sea Turtles


We ended our summer themed camp of Seashores and Oceans with these shimmering Sea Turtles!


The watery background was created with crayons and painted first with clean water, then with watercolor, called a wet-on-wet technique. While the paint was wet, we added a little salt for a more watery look. 


While the paint dried, we created our sea turtles. We traced the shell on a piece of heavy duty foil using an embossing tool (like a leadless pencil) and added the interior shapes. The we placed a texture plate beneath each shape and colored over it with a Sharpie to create a new texture and a color for that area. 


After completing the shell, we embossed the shapes of the fins, head, and tail. Again, we colored them over texture plates. 


Then we cut everything out and glued our shimmering sea turtles into their watery background.


Next time I plan to have a greater variety of Sharpie colors on hand for even more colorful shimmering sea turtles!