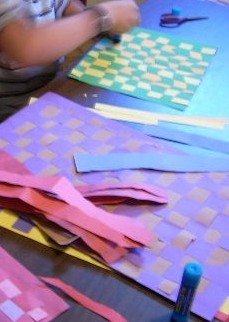
 This week our Art Adventurists made colorful paper weavings. This project involoves a lot of cutting, which suited these kids just fine! Weaving skills can be fun to learn, although challenging for children younger than six or so. It's not the "over and under" concept that's so difficult, it's the "under and over" for the second row that's tricky. Our group ranged in age from 3 to 11, so the youngest ones needed help with their weaving, but all were able to complete this project. The children enjoyed picking out various color combinations, and quickly learned that cutting crazy (instead of straight) slits to weave through would result in some interesting, almost vibrating designs (remember the "psychedelic" posters of the '70s?).
I encouraged the children to select colors that are opposites (complementary) or near opposites for the best effect. Also, remind them to continuously slide their weaving strips together (until they touch) after they have been woven though the slits of the second sheet. Slide, slide slide!
Be prepared to allow the kids to make more than one paper weaving - they'll want to experiment with bolder colors and even bolder cuts for more interesting designs.
How to Make Paper Weavings
Materials:
Colored Construction Paper (9 X 12 is fine, 12 X 18 is better)
Scissors
Glue Sticks
What to do:
1) Select two sheets of construction paper of the same size and different colors.
2) Cut one sheet into strips (the short way) about 1 inch wide (if they vary in width, that's okay.)
 3) Fold the other sheet in half the short way, then cut slits into the paper started at the folded side and stopping about one inch from the opposite end of the paper. Cuts don't have to be straight of even, in fact curvy and angular cuts are encouraged.
4) Once it is full of slits, unfold the paper, carefully flatten it out, and weave the paper strips in and out of the slits, over and under, sliding them over to one side before adding the next. You will have a couple strips left over.
5) Glue down the ends of the paper strips for a neat, finished appearance. Now you can hang your paper weaving on the wall, laminate it for use as a place mat, or (?)
By the way, I posted the instructions for our last project - Crazy Tops - on my Homeschooling Helper weblog as an example of what we are doing at the Blackfoot Art Center. Go ahead and take a look - your children will have fun while learning about light and color.
No comments:
Post a Comment