Friday, August 19, 2022

Makey-Makey Camp!


Makey-Makey Art Camp continues at the Blackfoot Art Center! 


For the last two class sessions (partially due to the heat) we moved indoors and explored our MakerSpace and the concept of making (which comes quite naturally to most young artists.) 


Campers were challenged to make anything they liked from the materials available to them. They could choose from our Makers' handouts, such as Flexigon fidget toys or this balancing Robot.


This week we decided to make some duct tape projects. Shown here is a pencil pouch with a clear window and a ziplock closure. 


Boys' wallet - outside

We also made folding wallets such as this one.  This folding wallet has a window pocket, two card pockets, a secret pocket, and pocket for bills!


Boys' wallet - inside


We even made a special "Artistic License" to place inside the window pocket.


More custom made wallets:

Another option was to make something from our cardboard scrap pile and/or our junk box - I mean Treasure Chest! Or, campers could simply make something from a cardboard box. All of the studio supplies were available to them, including construction paper, glue, tape (six types!), staplers, markers, and anything else on our shelves. 


I have learned that kids love to make things that they can use or play with later on, such as the balancing robot (shown above), or this Flexagon fidget toy...

... or this tabletop Skeeball game! 


The game was constructed from a flat cardboard box and includes a rubber band marble launcher and a marble holder. It also folds for easy portability. Wow!


Also popular with Makers are models, which are the first step in the design process. Of course, some makers create a sketch first, but many dive right into building the model itself. Here is an intricate model of a vending machine, which was a collaborative project between two siblings.


Model of a toy vending machine

Vending machine side opening

Vending machine graphics

Thursday, August 18, 2022

More Nature Weaving


We had a lot of interest in weaving this summer, so we creating some additional types of weaving projects. 


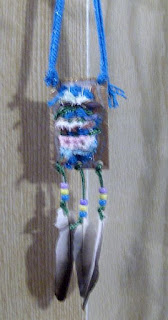
Here we have a traditional weaving that was created on a cardboard loom with a stick woven into the top of the loom. When the piece was cut from the loom at the bottom, the stick was already in place at the top. The artist added a stick, beads, and feathers to the bottom, and tied a hanger to the top. 


Campers also wanted to make wearable woven art.


These little weavings are created on a tiny cardboard loom that becomes part of the piece when completed. 


You can see more details about how these are created on our previous post, Wearable Woven Art.

Wednesday, August 17, 2022

Nature Weaving


Weaving is a traditional skill that we have practiced in the past using carboard looms. The completed weavings were removed from the looms, which could be used again and again. 


This time, we decided to make a handmade triangular loom using sticks that we found in our green space. The loom in this case would become a part of the woven art piece.

We first bound the sticks together at the corners. Then, starting at one corner, we wrapped the warp thread across and around the loom to create starburst effect. We could achieve this by gathering all of the warp threads together at the center and binding them with weft (the yarn to be woven into the warp) and then continuing to weave the remainder of the weft around and around the center to create a 'disk' of weft. 

Then we changed colors and/or textures of weft and continued weaving. No tying off or anything, just weaving and hiding the ends as new yarn is added.  


I enjoyed observing the kids' color choices. Some went with bright, showy colors; others with earthy, natural colors.

 
Our young artists were skeptical of this whole idea at first. Circle weaving in a triangular loom???


Binding the loom together was challenging, and wrapping the warp thread around the loom was tricky. Unless you had a very knobby stick, the warp thread could slip. If you are working with a smooth stick, one option was to wind the string around the stick an extra time before pulling it across to the other side and continuing.


In any case, the end results were very nice, and the kids were excited about adding additional natural elements such as feathers and tiny pinecones. 


For more about about nature weaving, see our previous Summer Art Camp 2020 post.

Tuesday, August 09, 2022

Nature Clay Mobile


Makey-Makey Art Camp at the Blackfoot Art Center is all about (you guessed it)  MAKING STUFF! 

We started outdoors with some beautiful circle weaving using looms made of natural sticks. Next, we switched to airdry clay to create a nature imprint hanging mobile. This was a 2-day project because the clay needed to dry overnight. 


Artists first explored our green space in search of interesting objects that could be impressed into clay. They worked the clay until it was soft and rolled it out to create a slab. Then the pressed each object into the clay and cut around it with a table knife to create a piece for their mobile. Some objects had very distinct textures (such as juniper bush evergreen needles), while others were flatter and less easily seen (like leaves). 


Once all of the clay was impressed with an object, we then flipped over each piece and impressed a new object into the back of the piece. Some artists embellished a piece of two with additional markings using clay tools. We also cut out a hole into each piece for hanging. 

The next day we painted each piece with acrylic craft paint. This was a quick process, especially working outside on a warm day! Artists chose natural colors and painted one side of a piece, ensuring the the impressed areas will filled with paint. Then, before the paint dried, they wiped off the piece slightly with a damp paper towel so the impressions would pop out, and repeated the process on the other side. 


We sprayed them with acrylic gloss sealant (Krylon) and began the process of stringing them to a birch stick.  We strung a few pony beads to a piece of jute for each piece before tying it on. Then we laid everything out on the table to decide what will go where. 


We found that placing the larger piece in the middle helps to balance the mobile, and placing the others at various levels keeps them from banging together (these aren't chimes - and they could break!).