Sunday, May 31, 2020

Drawing My Room


Continuing with Part 3 of our Expanding Drawing Skills series, we're going to draw our living space, or the details of the room that we are in. These types of drawings are called "interiors." 

To draw an interior, all you need are a drawing pencil, a large soft eraser (white is best), and a drawing board if you have one. The drawing board allows you to relax on a couch or chair and set up your drawing surface at a comfortable angle. 


First, observe the room and decide where to start. It often works well to start on one side of the room and work your way to the other side, such as left to right. Try to include as many details as possible. Remember that things nearest you "overlap" objects that are farther away.

Both of the drawings above are of the same living room, but drawn at different times and by a different artist. Can you tell? What parts of the room are the same? What is different?


Here is another interior drawing, this time of a bedroom. Is this a clean or a messy room? Is this a boys' or a girls' room? How can details help a drawing tell a story? Would you say that details make a drawing more interesting to look at?


Here is an open closet in the same bedroom. The only thing missing are the shoes! 

(The artist said they were too messy to draw.)

This started out as a centerpiece drawing project from a book called Drawing With Children. The artist then completed the drawing by placing the centerpiece on the table in our kitchen. He added cabinets, drawers, chairs, and even our parakeet, Monet!

This interior drawing shows a corner of a classroom. Notice the toys in the 3-dimensional shelves, the posters on the wall, and the blocks laying on the floor.

When beginning an interior drawing, don't ever decide that the scene in front of you is "too hard." 

Just start drawing, one object at a time. Use a piece of ordinary copy paper or drawing paper and fill it up to all four edges. Don't try to squeeze everything in. Just draw to the edges of the paper as through you are taking picture with a camera. Each time you draw an interior, the next one will be easier for you.  Go ahead, give it a try!

Next: Our favorite Halloween Art Project Ideas you can try at home!

Saturday, May 30, 2020

Drawing from Life


In Part 3 of our Expanding Drawing Skills series, we're going to draw from life

In other words, we'll use our powers of observation to draw what we see!


Do you ever draw the things that you see around you? If so, that's great! If not, let's give it a try. 


Drawing from life helps you to see details that you might not otherwise notice.  You observe how objects are placed in relation to other objects, such as behind or in front of or stacked or beneath or next to other things. 


The best way to get started is to sketch your own belongings - simple things you look at every day.  Use a black marker or Sharpie so that you aren't so worried about erasing "mistakes." Just draw what you see and have fun.


Now let's try some Object Studies.

Find a simple object to draw, such as a roll of masking tape. Draw from as many angles or "view points" as you can: top, side, and three-quarter view (meaning you can see both the top and the side at the same time). Draw these all on the same sheet of paper. 

Try it again with another object, such as this bottle of white glue. See how many views of the object you can find to draw, such as the bottom and a three quarter view of the object laying flat on the table. 


After a bit of practice, it's time for a nature walk! Look for something interesting for an object study; such as this tiny piece of an aspen branch. Can you find a twig, a pine cone, a flower, or an acorn? Use a pencil for this study. It's okay to erase if you need to. 


Let's try drawing something a bit more complex - like toys! If you have any Beanie Babies around, they make great models! You can set up a Beanie Baby any way you want and draw it again and again!


Now let's dig a little deeper. 
For this drawing, grab a small handful of Legos or other tiny toys or figures, and drop them on a table. Observe each piece carefully and draw it. Draw all of your objects on the same page. 

The best way to improve your drawing skills is to keep practicing!
Draw from life every day. Draw whatever you see around you. Draw objects in your desk drawer and on tables and shelves. Draw kitchen utensils and tools and appliances. 

Best of all, draw toys! So much fun! Try drawing a plushy lightly in pencil. Then go over your lines with a Sharpie, adding more details and fuzz. Then erase the pencil with a big soft eraser. 


Next, we'll draw your room and everything in it. Yes. Even if it's messy.

Saturday, May 23, 2020

Storytelling through ART!


Dragons, by Elliott - age 6

In Part 2 of our Expanding Drawing Skills series, let's learn how to tell a story with ART!


Story drawings (also called graphic stories) are a fun way to tell a story using pictures without words.  Your stories can be imaginary or funny or about anything at all that is interesting to you. 


To get started, use your sketchbook to explore ideas. When you come up with something that suggests an interesting story, draw your idea in your sketchbook. Then you can complete your final story to share with your family and friends. Here are some ways to do that: 
Candy Dilemma, by London - age 9


Action Drawing!  Tell a story with just one drawing. For example, what is going on in the exciting drawing above?  Could you tell or write a story about what you see in the drawing? (Using action and small details are great ways to help tell your story!)  
TIP: You can also add words such as dialogue and signs in your artwork, such as in this grocery store scene.


Write a book! Draw a series of pictures that tell your story. Staple the pages together to make a book. Then make an interesting cover. Another way is to make a blank book first, then fill the pages with your story art. You can also write your story on several pages and illustrate each page with your drawings.   


Make your own comics! 
Start by using your sketchbook to find an interesting character to use in your comics. Try lots of ideas!

Now you will need to figure out what your chosen character(s) are going to do. Use your sketchbook to experiment with ideas, such as in this sketch of Biff and Spiff building a blanket "castle" in the living room.

TIP: Your comic can tell a simple story, such as planting a seed, which grows into a tree, which a child climbs to discover a bird nest. Or, it can have a "punchline," which is a little joke at the end. Just remember that your story should have a beginning, a middle, and an end. Remember to try lots of ideas!


Biff and Spiff love music!
To draw your final idea, you will need panels in which to draw each part of your story. You can simply draw the panels* (at least three) or print out these blank comic strip panels. Now all you need to do is draw what happens first, what happens next, and how things finally turn out. 

Bonus! Each time you draw and re-draw your characters, your drawings will improve and you will further develop their unique personalities!

* Of course, you can use more than three panels for a longer story - but often, three panels is all you need!

Click here to download a pdf comic book of Biff and Spiff's crazy adventures!   Notes: Biff and Spiff comic strips were created and drawn by Alicia B. at the age of 12 and published monthly in our home school newsletter, Time for Kids.  Biff and Spiff's adventures are normal ones - like anticipating a dental visit, worrying about school, getting an allowance, surviving an earthquake, taking baths, boredom, and being naughty! 

Here's a Printable Detailed Lesson Guide for this lesson.

Next up, Part 3 of our Expanding Drawing Skills series: Drawing from Life.

Saturday, May 16, 2020

Ready! Set! Action!

Welcome to the first of our children's Expanding Drawing Skills series; an introduction to "Creating ACTION in Art", which provides ideas and methods for adding motion, movement, and action 
to student drawings and artwork.

Have you ever wondered how you can add movement and action 
to your drawings and artwork? 
Take a look at this video to help you get started!


Now it's YOUR turn! 

The projects in this lesson will help you build your drawing skills and make your drawings more interesting and exciting by adding action and motion. Choose the projects that look interesting to you, or try them all. Let’s get started!

You'll need your sketchbook (or several pieces of copy paper) and drawing media of your choice, such as graphite pencil, colored pencils, crayons, markers, etc. Optional: It might be fun to draw your moving animals or figures on a long strip of paper (or several pieces of paper taped together).

Project 1: Jump, Dance, Spin Around!
Remember our earlier Fill up Your Paper weblog post, when we filled up a large piece of paper with as many _______ as we could think of? Let’s do this one again with one new rule: each ________ must be doing something or must be in motion! Your subjects can be running, jumping, swimming, standing on their heads, diving, walking on their hands, dancing, spinning, cartwheeling, somersaulting, or anything else! Silliness is encouraged!!!

Project 2: Animals in Action!
Choose a favorite animal or creature that you enjoy drawing and draw it normally. Now, imagine your animal subject doing something interesting, and draw it again. You could draw a horse in a standing position. Now draw the horse rearing or bucking or rolling in the dust. Can your horse walk, trot, or gallop? Use a long strip of paper for this one!


Project 3: Figures in Action!
Choose a human figure that you enjoy drawing and draw him or her as you normally do. Now draw the same figure again in motion. Remember that humans have knees and elbows that bend when in motion (like Batman, below). Remember drawing of the running figure in the video? Make your figure walk, jump, skip, trip over a rock, fall down, get up, and run! You might use a shadow beneath the figure to show when he is not touching the ground! What else can your figure do? Use a long strip of paper for this one to show his or her progression of motion.

Project 4: Heroes in Action!
This is just like Project 3, only this time let your ‘action' figure be a super hero or sports hero! Think about the kinds of ‘extreme’ actions you would see this character doing and draw him or her in action!

Project 5: Planes, Trains, and Cars
How can you add action to a drawing of a vehicle? Could a speeding car be drawn above the road slightly with a shadow beneath it (as in the running figure)? Try drawing its wheels as ovals leaning forward. Could the car have smeared lines behind it to show motion, and a blurry background?

Project 6: It’s a RACE to the Finish!
Draw an action scene that includes everything we’ve learned that could add action and motion to a completed scene. This could be an exciting horse (or animal) race, race cars on a speedway, a military or battle scene, or an action-packed sports scene. Add lots details that depict motion and action! 
Project 7: Make a Flip Book!
Why not make a flip book to show movement and animation? You can use a Post-it notepad for this, or any other paper stapled or clipped together (I like Post-its the best). You’ll draw the first picture on the bottom page. Then flip to the next page for a slightly different drawing. Continue drawing the figure as it completes the action with just a little change in each drawing from one page to the next. Check out this video to see how to do this, while making your own practice flip book.

Click here to download a printable handout of this lesson.

Now you can use ACTION to create story lines for your own COMIC STRIPS!

Thursday, April 23, 2020

A Silly Alphabet Drawing Game

Bored? 

Here's a fun little drawing project! Create your own silly personal alphabet! You can do this by yourself or you can play the Silly Personal Alphabet Game and see who can create the silliest, most unique personal alphabet! Hint: This game is especially fun for kids to play with a grownup!

You can download the complete instructions and the Silly Personal Alphabet handout shown by clicking on the link or the blank alphabet handout above.  

Don't forget - send us a photo of YOUR silly alphabet!

Next: Learn to add ACTION to your artwork!

Tuesday, April 21, 2020

Earth Day Art Ideas


The EARTH without ART is just 'EH.' So true!

In fact, nature is full of patterns and beauty that is art in its purest form.


Nature's art can be seen everywhere; in plants, trees, fish, animals, seashells, insects, minerals - even the Milky Way!


To celebrate Earth Day, let's take some time to see the beauty in our natural surroundings. Many artists celebrate nature through art by using natural objects to create environmental art (also called ephemeral art.) Click here to see a slide show about environmental art-making. Slide 11 has some tips for creating your own environmental art. Please take pictures of your artwork, disregard #5 on the slide, and email your photos to us for our Earth Day art gallery.

Younger students might enjoy creating this sweet Four-Seasons tree art that is made from natural items found your own backyard! Super cute! (From Red Ted Art.) 

They might also enjoy making these Nature Weavings! We made these at Summer Art Camp a few years back, and our young artists absolutely loved making them!


Older kids might want to visit Buggy and Buddy to learn how to make natural book markers using pressed leaves and flowers. These are really beautiful and you probably have everything you need at home. (Tip: you can use clear packing tape or contact paper to laminate your book markers.)


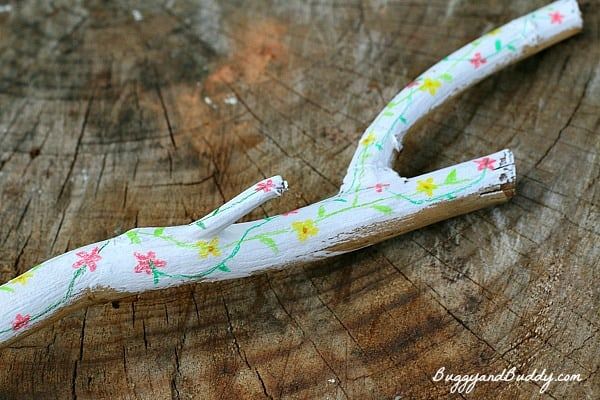
Also at Buggy and Buddy, you can learn how to use a stick as a painting canvas! Could you turn this into a jewelry tree?


Let's make ART that celebrates our beautiful earth!
To learn more about Earth Day you can visit -   https://www.earthday.org/earth-day-2020/

Now it's time to get silly and create your own Silly Personal Alphabet!

Monday, April 20, 2020

Wildlife in the City

Every cloud has a silver lining! That means that when life gets hard, sometimes a little good comes with it too.  
We might be "bummed" about having to stay home, but maybe staying home has given our Earth a rest. The air is cleaner than it has been in decades because cars and airplanes aren't polluting the air.  Even better, wild animals have been leaving their hiding places to explore cities and towns all over the world, like the mountain goats above in LLandudno, Wales.
Without all the people and cars and noise to scare them away, all sorts of wildlife has been spotted wondering through our deserted streets, parks, and yards. In Nara, Japan, spotted deer park wander the streets; and in Colorado, these adorable bobcats are taking a sunbath on a porch.

The idea of wildlife in the city gave me an idea for a fun art activity that we could do to commemorate Earth Day. Why not use photography to celebrate our wildlife? Let's search for wild animals in our neighborhoods and take pictures of them to create artwork. So, how do we do that? 
Hmm... wild animals often visit at night and don't always want to pose for pictures. They may not be as easy to find as the spotted deer in Japan.  If you can't find a wild animal to photograph, maybe we could create our own wild animal "visits" for our project! 

Do you have any plushies or toy animals that look somewhat realistic? Gather them up and place them in your backyard to appear as wild visitors! Try a few different hiding places and positions. Snap pictures from various angles until you get the perfect shot! 
In these examples, I found a bald eagle in the tree in my backyard, a little fox next to my gate, and a moose hiding in the tall grass. Amazing!!!

Give this a try and send us your wildlife pics! You can email them to us or you can have your parents message them to the Art Center on FacebookWe will post your pics on a special online gallery. I can't wait to see your photos of "wildlife in the city!" (Especially your own backyard.)

Take a look! We have more Earth Day Art Ideas for you!!!

Thursday, April 16, 2020

Be a Doodler!

PIC BY CATERS NEWS (PICTURED - Joseph Whale, 9, from Shrewsbury, doodling in his maths book) - A young boy who was told to stop doodling in school has shunned the doubters by being asked by a restaurant to decorate their dining room. Little Joe, 9, from Shrewsbury, kept getting himself into trouble for doodling once hed finished his work during his classes at school, so his parents, Greg Whale, 40, and Vanessa Jameson, 36, sent him to an after school art class to chase his creative passion. After joining the art club, his teacher noticed he had a gift and posted his work all over her Instagram for her followers to see. Soon after the post, Number 4, a restaurant in Shrewsbury, contacted Joes teacher and asked if he could come to their building and decorate the dining room, which Joes parents accepted - Joe has now had over 1.5 million views on his dads LinkedIn account and spends his time after school showing a restaurant full of customers his amazing talent. - SEE CATERS COPY
Meet Joe. Joe likes to doodle. But Joe was told not to doodle because it was a waste of time. Then Joe got a paid job to DOODLE! 
See Joe's inspiring story, then try a little doodling yourself!

You can see more about Joe Whale and his Doodle Art at at https://mymodernmet.com/joe-whale-the-doodle-boy/

All you need to be a doodler are pencils or markers or Sharpies (for older children/adults) and copy paper or your sketchbook.

Why should you doodle? Doodling helps to generate fresh ideas. Doodling distracts the mind from focusing on a given problem, allowing the unconscious mind to kick it around and inspire solutions. Doodling has even been shown to help us listen more intently to “boring” lectures! So instead of a distraction, doodling may actually help us to be better at whatever we are doing!

These doodles will be simple, fun line drawings. They can be cartoon-like. They don’t need to be realistic or perfect. They don’t need shading. Sharpies are great for doodling – no need to erase!

Here is a fun way to practice doodling!
Jake McDonald, illustrator
 
You'll need a piece of drawing paper and a marker or Sharpie. Pencils are okay (try not to erase). Choose a simple fun theme, such as girls’ things, sweets, flowers, bugs, monsters, or fast food. Then doodle as many of these items as you can think of, and more! Fill up your paper with doodles.                                                                                           
GAME - Doodle Buddies!

Materials: pencils, pens, markers, or Sharpies (two different colors are great!) and any white paper (copy paper is perfect)

The first player draws (that is, doodles) any type of line on the paper. It could be a squiggle, a swirl, a zigzag, or anything else. Here are some examples. What do you see in these doodles?
The second player then turns the doodle into a picture of something (using a different ink color, if desired). It helps to turn the doodle in different directions until you see something in it that you could draw. Now it is player two’s turn to draw a doodle for the first player to finish. Players (doodle buddies) continue to fill up the same sheet of paper with their shared doodle art, then both artists can sign and date the finished artwork. From https://www.instructables.com/id/The-Doodle-Game/

TIP: Each player can start a Doodle Buddies doodle page simultaneously on their own sheet of paper, then exchange with their buddy. That way both are drawing and no one is waiting for the other artist to finish. You'll end up with two full pages of doodle artwork!
 
Our next art project celebrates Earth Day, wildlife, and photography! Check out Wildlife in the City!

Tuesday, April 14, 2020

Every Kid Needs A Sketchbook! Part 2


How can you motivate your child (or yourself) to get into the sketchbook habit?

Honestly, it's an easy habit to acquire. For most children, a personal sketchbook is a dream come true! 


The sketchbook is a private place in which to visualize dreams, record special memories, explore new ideas, imagine what could be, create new worlds, reflect on life, practice drawing interesting subjects, and so much more! The sketchbook often becomes a valuable personal possession.

While scrolling through my children’s old sketch diaries, I found that their drawings were visual explorations of a surprising variety of subjects!  For example, when my oldest son was about nine to ten years old, his sketchbook included:

Detailed drawings of a starfish from three angles
Observational sketches of wild flowers, in color
A cartoon cat named Spike
A mixed-up animal with a wolf head, wings, and stripes
A Siberian tiger drawn from 3 different angles
A color sketch of two parrots
A moose being encircled by four hungry wolves
A Unicorn and a Pegasus
Horses in a pasture
The stage antics of a singing star named Singing Sam
An action-packed football play resulting in a touchdown - and a face mask penalty
A basketball player about to “stuff” a basketball, side view
Another basketball player, same play, from “backboard cam” (above the basket)
A football cartoon in five panels
A variety of space age vehicles, all types
Favorite football team helmets, numbered 1st through 8th favorite
Cartoon characters showing a number of action moves including jumping, kicking fighting, dancing, running, and doing the splits
An entire Star Wars space scene
The interior of a jet cockpit on a runway
Detailed drawings of each Teenage Mutant Ninja Turtle with written facts
A formula one race car scene with a wreck happening at the rear
A basketball player swishing a basket from the opposite end of the court
Ninja turtles fighting bad guys
A monster truck with happy face spotlight covers
A boxer “connecting” another with a blow to the head
Paratroopers successfully vacating a burning airplane
A 4-panel cartoon of a stickman golfer, who started poorly, then golfed ‘swell’ 
An intensely action-packed war scene
An incredibly complex maze (unfinished)
Two professional wrestlers with bulging muscles and masks
A cute baby with long eyelashes


My point is that your child has a lot of mental and imaginary exploring to do. He may not be able to fly a jet, but he can draw the inside of the cockpit and what the runway looks like during take off. He can even create a close up view of a professional basketball player dunking a basket using a personal backboard cam! 


He can imagine himself in any type of situation, visualize it, and safely immerse himself in it with nothing more than a pencil and paper. The sketchbook allows him to keep these special records in a permanent place for future reflection and ongoing imaginings! 

Get your child started with his/her own personal sketchbook (store-bought or handmade) and a few basic drawing media, like drawing pencils, colored pencils, and markers. Encourage personalizing the front of the sketchbook in some way. Then there is just one task: draw anything. It’s as simple as that. 

You might encourage your child to draw something every day. Or you might suggest certain types of drawings to try when they don’t "know what to draw." You might ask:

Why not draw something in this room? 
Can you draw your favorite animal doing three different things?
Can you draw your favorite comic character or your own comic characters? 
Can you fill a page with design patterns (or Zentangle) or write your name in fancy/3-D lettering? 
Can you draw yourself flying above our house?
Can you draw a landscape or a moonscape or a seascape? 
... and on and on.  
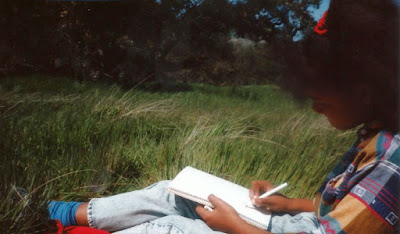


They'll get the picture (so to speak) and off they’ll go!


As a final thought, many of the drawing projects and art lessons I have posted since beginning our school-at-home art club lessons are perfect candidates for your child's sketchbook! 

For example, Be a Doodler to loosen up the drawing muscles and get the imagination moving!