Tuesday, June 13, 2023

Yummy Donuts!

Artist age 8

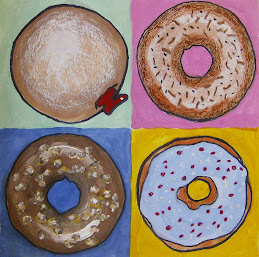
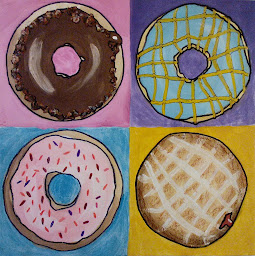
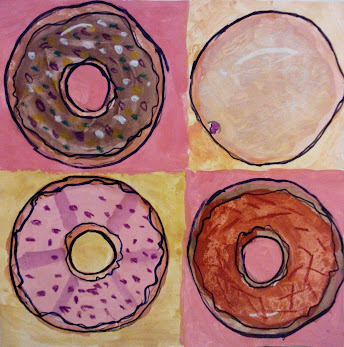
Have you ever noticed that, besides yummy morsels of sweetness, donuts are actually delightful little pieces of art?

Fancy or simple, iced or filled, it seems as though each donut is so carefully crafted it seems almost a shame to eat it! 

But yet, who can resist? It's a real conundrum.
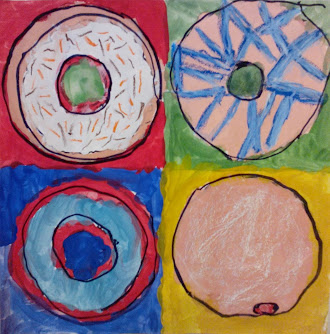
Artist age 5


To celebrate National Donut Day (June 2) we created donut art! (We probably would have done it anyway.)


Our young artists had lots of exciting ideas about how to design and decorate their own donuts!
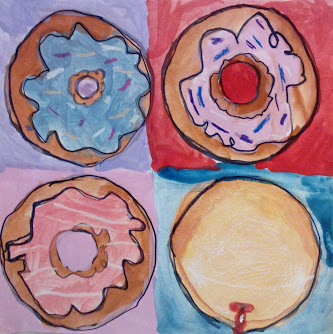

Artist age 6


First our artists divided a 12" by 12" piece of sulfite paper into four squares using a ruler. 

They then traced a cardboard circle template, lightly with a pencil, in each square. A hole was added in the center of each one - unless it was destined to be a jelly filled donut, of course.


Now it was time to plan how each donut would be designed.


Any icing slathered on a donut was outlined, and then all pencil lines were traced with black Sharpies (to be more easily seen while painting).

We used cake temperas, which we mixed with white liquid temperas on a palette for pastel tints. 


Donuts were first painted with soft tans and browns around the
outside and inside edges of the donut shape. The icing colors were added next, using light tints here and there to create a little shine. 


After the paint was dry (cake temperas dry fast!) sprinkles and textures were then added using oil pastels, paint, colored Sharpies, and colored pencils.

A background color was then added to each square, and the donuts were outlined once again for a strong visual effect. Sweeet!!


This artist used watercolor colored pencils to create these beauties:
My demo
My sample


        You can learn more about making your own donut art by visiting our previous post, Delicious Donuts!  

Thursday, June 08, 2023

Beautiful Irises!

Purple Irises, by Jackie (adult)
tempera paint/oil pastel on watercolor paper
This week we examined the works of Dutch painter Vincent van Gogh, who is considered one of the greatest Post-Impressionist artists.

Did you know? Van Gogh only took up painting during the last ten years of his life, and many of his most famous works were painted during the two years prior to his death. He sold only one painting during his lifetime! After his death, his works became incredibly popular, selling for astronomical sums at auctions.

Scarlet Irises, artist age 9
tempera paint/crayon on watercolor paper

Van Gogh's life was a series of ups and downs, but one thing that made him happy (besides painting) were the beautiful iris gardens at Saint Paul-de-Mausole in France. So, he explored this subject often and painted a series of irises - both in the garden and in vases. 

Irises make us happy too, so we decided to paint our own versions of van Gogh's Irises.


Blue and Purple Irises, artist age 11
tempera paint/oil pastel on watercolor paper

One thing we noticed about van Gogh's irises, (and most of his other paintings) was that his brush strokes were very interesting and expressive. They seemed to talk to us or to express what he was feeling as he was painting. Indeed, van Gogh was a predecessor of the Expressionism movement in modern art. 
Blue Irises, artist age 8
tempera paint/oil pastel on watercolor paper


To create our irises, we did not use oil paint and brushes as van Gogh did. Instead, we used tempera paint and - our fingers! That's right, we finger painted. This allowed us to use our fingers just like brushes, and in this way we were able to connect more closely with the painting process and express ourselves through paint strokes made directly to the painting surface.
Soft Blue Irises, artist age 14
tempera paint on watercolor paper

Before we began to paint, we had a quick lesson in drawing irises using this simple guide. We drew them directly on the paper using black crayons or oil pastels. Then we added stems and long, sword-shaped leaves.

I set up our colors in foam egg cartons for easy finger dipping. We also had plenty of white paint to add to bold colors to make pastels and tints like lavender, sky blue, and mint green.
Blue-Violet Irises, by Tasha (adult)
tempera paint/oil pastel on watercolor paper

Finger painting is a lot of fun and a great way to loosen up and form a direct connection with one's artwork.  The fingertips are used to layer or blend and make new colors directly on the paper. You can add highlights and shadows with just a touch of white or a shadowy shade of color. You can create textures by dabbing, swirling, smearing, and mashing paint as needed. 


Painters learn as they go how and where to use bold colors and how to blend colors for more subdued areas, such as the background. They even learn how to fill in the smallest areas using just the tip of a finger. This all becomes part of the creative process. 

To learn more about finger painting at any age, visit Iris Scott's website (love the name), a contemporary artist and fine-art oil finger painter

If you would like to learn more about painting van Gogh's Irises and more student artwork, visit our previous weblog post, Van Gogh's Irises.

Thursday, June 01, 2023

Apples - 4 Ways

Red Apple, mixed media. Artist age 14
 

So... how many ways can an artist portray an apple?

Turns out, lots and lots of ways!

We decided to explore what we could do artistically with an ordinary apple. Our goal was to create apple art using at least four different types of art media. 

This artist utilized charcoal, watercolor, colored pencil, and oil pastels to create her red apples.
One Apple - Five Ways, mixed media. Artist age 11

For more details about this fun lesson, take a look at our 
previous post, One Apple - Four Ways.

Thursday, May 25, 2023

More Dragon Eyes!

Red Dragon Eye
9" x 12" watercolor on paper, artist age 14


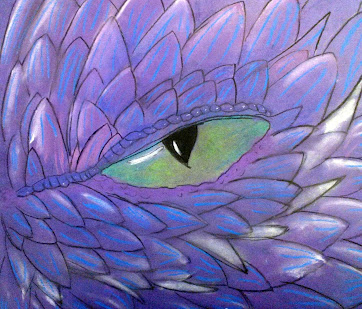
Dragons are a popular subject for many of our young artists, so this week we decided to create dragon eyes!

Artists could use any art medium for their dragon eye artwork. 


Our goal was to create an awesomely believable dragon eye surrounded by amazing textures, such as the sharp scales and boney details of the dragon's face above. Shadows and highlights were crucial!


This dragon eye incorporates the violet color of the paper while depicting overlapping and layering of the scales using drawing media such as pastels, charcoal pencil, and Sharpies. 


Green Dragon Eye
9" x 12" pastel, charcoal, ink on paper, artist age 11


The artist decided that the artwork needed something more, so she added some metallic highlights and additional detail within in the eye itself. 

Yellow Dragon Eye
9" x 12" mixed media, artist age 14


This is a mixed media version of a dragon eye, using a beautiful color combination of blues, pinks, and a yellow-green eye!


Flying Dragons
12" x 12" acrylic on canvas, artist age 14

For more about Dragon Eye art, see our previous post: Dragon Eyes!

Saturday, May 20, 2023

Giant Designer Feathers


We've been working on Bird Portraits, so why not design our own bird feathers too? 

These very large, unique feathers were painted with temperas in large sections around the center quills. They were then stamped with smaller and still smaller details as desired, while working somewhat symmetrically around the quill (unless not) to create a cohesive design.

Once dry, the feather is cut out with 'V' shaped notches like real feathers. Then we added a few fuzzy feathers at the bottom of the feathers and glued them to a piece of black poster board. 

It was fun to imagine what type of bird (or other flying creature) these feathers could have fallen from!


We made these Giant Designer Feathers in our Friday Art Adventures class.  You can also see more Designer Feathers in our previous post right here

Thursday, May 18, 2023

Backyard Bird Portraits

Northern Flicker, artist age 11

Since becoming an official "bird watcher" (Project FeederWatch), I have found that birds are much more than just these chirping feathered critters you see flying around in the yard. I enjoy identifying them, learning about them, and watching their behaviors. (There can be a lot of bird-drama in your own backyard if you pay close attention!) 

I have also found that the kiddos who come to our art classes are equally enthusiastic about birds!

So, as an ongoing project, we decided to paint Backyard Bird Portraits. 


Our goal is to paint portraits of local birds; that is, birds that frequent our area here in southeastern Idaho. That doesn't mean that we won't paint other birds too.  Sometimes you've just gotta paint a favorite bird, no matter where you might actually find it.

Blue Jay, artist age 14


This student has a special affinity for Blue Jays. She has included the Blue Jay in several different works of art, so this piece was a natural for her!

I've not personally observed any Blue Jays in our area, but they are listed on the eBird Field Checklist for our County. Have I seen Scrub Jays? Yes I have.


Anna's Hummingbird, artist age 11

This artist is a hummingbird lover.  She  painted Anna's Hummingbird, which is found along the Pacific Coast and year-round along the Oregon coastal areas.

Well. That's not so far from our neck of the woods. 


American Robin, artist age 11


Here we have (likely) the most recognizable bird in North America: the American Robin. In fact, when describing the size of a particular bird, it is generally compared to this red-breasted fellow: "Is it larger or smaller than a Robin?" 


This is such a fun project; I have painted a few of my own, the latest of which is this Black-billed Magpie. Big boisterous squawkers they are, but also spectacular, iridescent, and surprisingly graceful.

We're not done yet! Future Backyard Bird Portraits will be posted 
as they are completed.

Saturday, May 06, 2023

What is Impressionism?


Over the last couple of weeks we have been painting flowers as some of the Impressionists did, such as floral bouquets in the style of French Impressionist Berte Morisot and the cherry blossoms of Natalia Goncharova.  

I decided it was time for our artists to get to know the predecessor of modern Impressionism, Claude Monet and how he painted his impression of the form, light, and color of a scene. Artists would then create their own personal version of his famous Water-Lily Garden. 


These artists decided to include the Monet's famous Japanese footbridge in their paintings.  They began by drawing in details such as water-lilies, surrounding foliage, and the bridge. 

Then they painted over all using a wet-on-wet watercolor technique and added sprinkle of salt to the water.  After the paint dried, they brushed off the salt, which made shiny sparkles in the pond! Then they added a bit more oil pastel detail.

Aren't they beautiful?

These paintings were created by our Friday Art Adventurers.

Saturday, April 22, 2023

Pretty Pink Cherry Blossoms

Every year around this time we are ready to paint something spring-like! 

I have found that as a painting subject, these cheery Cherry Blossoms embody this much anticipated seasonal transformation - from cold and drab (a common symptom of acute cabin fever) - to warm, delightful, and "in the pink!"

Our vase of cherry blossoms is created in the style of early 20th century Russian artist Natalia Goncharova.

You can see more about her and previous versions of our cherry blossom paintings here and here

My most recent sample

These beautiful Spring paintings were created in our Friday Art Adventures class 
by kids ages 8 and 9 and their adult companions.

Thursday, April 13, 2023

Build Your Own Board Game!

Escape! board game 
If you are a board game enthusiast (like I am), have you ever had ideas for your own unique board game? 

Instead of just thinking about it, why not construct your own personally designed board game for family and friends to enjoy?  This is an exciting project for young artists - they have ideas! It's also an enjoyable project for adults (myself included!)

The theme of the game above is animals. The object is to help them to escape the Zoo and make their way to Animal Paradise! This aptly named Escape! game utilizes cards, handmade dice, and animal toy playing pieces on a folding pathway gameboard.  The 11-year-old game maker also designed a logo and a storage box for the pieces. Best of all, Escape! has already proven to be a family favorite!

Where is Blue Dog? The Game

I created this travel-themed card game based on Cajun artist George Rodrigue's Blue Dog series. 

Okay, I'll admit it. I trickily infused art history, social studies, and geography into my game. And it was a hit with my young game testers!


Building a board game is a lot of fun - but it takes time. There are several steps involved, including planning and then more planning. 

Here is a list of planning questions to help you create a successful board game: 

1) What type of game will it be: strategy game, word game, skill game, grid game, math game, card game, drawing game, or a start to finish (pathway) game?
2) What will be the theme of your game? Dogs? Golf? Bright shapes and colors? This will affect the artistic design of your game.
3) What will be the layout of your game? A board (folding?), a grid, a card game, a 3D maze? Will you need tokens or game pieces or a spinner or dice?
4) If a card game, what will the cards look like? What will they say (front and back)?
5) What will be the object of the game? How will it start and end? Who wins?
6) What are the rules for your game? (Remember to test the rules for playability!)

Use my (pdf) board game planning guide, Game Planwhich you can download and print to help you with your own board game plans.
Wizards & Dragons chess set


This is a hand-crafted Wizards & Dragons themed chess game. It features a carefully painted chessboard of worn stones, tangled vines, and various grasses and flowers growing through the cracks. 


The chess pieces are tiny clay figures, each an intricately hand-crafted character and the pawns are miniature wizard hats!

The designer and creator of this chess set (age 14) painted her chess pieces silver and gold.


SWAP an equation game for any age

The game of SWAP consists of colorful dots and squares glued to cards and strips of black cardstock.  It's easy to learn and easy to play, even for younger kids.

The rules are shown in the picture so you can make your own version of this game too!


Itten's Kittens board game
I made this board game (my first) for a college Color Theory art class assignment. I called it Itten's Kittens after Johannes Itten, an important 20th century Swiss painter, author, teacher, and color theorist.

I included a printout about the artist, but my young students simply want to get their pieces from the cat bed to Dad's chair first! 

Take Two word-building game
This game, Take Two, looks deceptively like an ordinary tubful of Scrabble tiles, but it is soooo much more! Take Two is our favorite family game, even to this day. Invented by my children as teenagers, we still play it whenever we get together and on camping trips and any other time. You need old letter tiles  (from Scrabble games found at thrift stores and garage sales) and a container to keep them in.  


Learn more about Take Two and how to play on my Homeschooling Helper weblog: Better Than Scrabble?

Now it's your turn to build a board game of your own!