Saturday, September 29, 2018

Dragons!


Our first Fall Session's art class theme was animal art, including horses, elephants, and bears, so it seemed fitting to end with these amazing DRAGONS!

This was a really fun project for all ages. I provided step-by-step drawing instructions for different types of dragons to give them the general idea, but I also encouraged them to draw from their imaginations -- and most of them knew exactly how their dragon would look. 


To start this project, we first drew a simple border around the outside of the paper. The dragon had to be SO BIG that it overlapped the border! 


We also added personal symbols to the borders or to the corners, and we painted our dragons with watercolors. The borders were then painted and more details added with markers. 

Some artists painted their backgrounds, adding a sky with clouds, and others chose to leave them unpainted. 


All of the dragons were outlined with black Sharpies and textures were added, such as various scale patterns.


This painting took two class periods to complete for some artists, and everyone really enjoyed it!

Our thanks to Art Lessons for Kids for this awesome dragon art idea!

Friday, September 28, 2018

Peaceful Pastures

Peaceful Pastures

Green grass in the summertime
Golden in the fall
Purple mountains far away
Blue skies over all
The pasture is a peaceful place
That wandering horses share
The air is warm, the grass is sweet
For the stallion, foal, and mare.


We try to do an art project related in some way to farm animals shortly after the fair.


This year we painted a lovely landscape of happy animals in a peaceful pasture. 


My original idea involved cows, horses, sheep, etc. Most of the kids chose horses but a few choose other creatures with more suitable environments, such as this little goat under a canopy at the fair.  


We started by drawing our animal. I provided some simple drawing steps for the horses and a few other animals. Most of the kids drew them using their own style and drawing experience. 


Then we drew a horizon line and painted in our distant mountains along the line, using liquid temperas. 


We added the sky above the mountains the green pasture below it, leaving the animal unpainted. 


Both the mountains and pasture required a lot of color mixing to achieve these beautiful tints and hues. (We almost never use the colors straight from the jar or pan.)


Then we painted a dark green tree line along the horizon line that overlapped the pasture and the mountains to show distance.


This artist chose a dessert home for his camel, so he mixed all his own colors for this arid landscape.


At last, we painted in our animals. Those painting horses looked at a variety of horse breeds and colors before deciding which one to paint. 


We focused carefully on details because the animal is the center of focus for this painting. 


Here is an appaloosa. 


Even our youngest artists could successfully create this painting!


A camel in the dessert.


Notice the other horses in the distance. 


Another appaloosa, and lots of color mixing!


A bunny family! Notice the lovely clouds between the mountains.


Thursday, September 27, 2018

Bears in the Berries!

What do bears do in the autumn? Same thing they do all year round - EAT! 

In the fall bears must fatten up for the long winter months of hibernation. 

What do bears eat? Everything! 

Bears love fish - and they really LOVE berries! Our bears found plenty and as you can see they are gorging themselves with BERRIES!


First we sketched our bears. The we painted them lightly with watercolor and we also painted in stems and leaves of our berry bushes. 


To complete our bears, we added a furry texture over the colors with short strokes using detail brushes.


We added blotches of color to our to our berry bushes.


Finally, we went in with markers and Sharpies to outline the berries and add details to our bears.  


Saturday, September 22, 2018

Celebrating Elephants!


Did you know Sept. 22 is National Elephant Appreciation Day?


This week we celebrated our love and appreciation of these amazing creatures by creating elephant art!

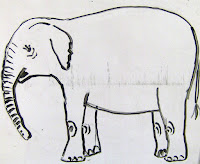
African elephant sketch


First we talked about elephants. I wanted to know what the children know about elephants. Where do elephants live? What are their lives like? What are the differences between African and Asian (or Indian) elephants? Why are many elephants endangered? Turns out they know a lot about elephants!
Asian elephant setch


The artists then chose which type of elephant to draw. Our focus was to draw the elephant realistically and really LARGE! 


I walked them through the drawing on the dry erase board, using step-by-step instructions that I found on Cartoon Critters. I adjusted the instructions so that they could draw either type of elephant. They drew their elephants lightly in pencil. Next, they traced over the final drawing with a black Crayola marker. (Note: Washable Crayola Markers work best for this project, if you have them).

Now we went over the entire elephant with a wet paintbrush, which allowed the ink to spread and bleed, creating many great shades of gray, like blue-gray, violet-gray, green-gray, and light or dark grays. 

Our young artists absolutely loved this step (and so did I)!


My sample of a festively painted Asian elephant
The elephant was then set aside to dry while the artists created an appropriate background for their type of elephant. We used tempera paints to create an African savanna or an Indian motif design. As an option, our Asian elephants were painted and decorated with paint, markers, and scrapbook papers.

While the background dried, they added a bit more marker to define their elephants' skin folds, wrinkles, and edges; then they carefully cut them out and glued them to their background scenes.  


Thanks to Fun Art for Kids for this great elephant art project idea! We loved it!

Thursday, August 16, 2018

Mosaic Makers!!


For our final week of ART Camp, we made mosaics!

This is one of my favorite all time projects, and I just love sharing the process with our young artists!


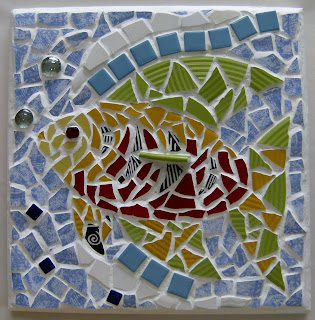
We built mosaics both large and small. We started with this little pocket mirror so we could learn how to design, glue, and grout. These were tiled on both sides. Abbi also made a drawstring pouch for hers. Here are the front and back views of her pocket mirror.


Next, we drew a simple design on a larger piece of wood and filled it in with tiles and broken ceramic pieces, such as broken china and dinner plates. 


We could also choose seashells, beads, acrylic marbles, wood shapes, and lots of other things. 


This picture shows part of our workspace.


We glued everything down and let it all dry overnight.  


After the glue was dried, we grouted the mosaic with plaster of Paris. We mixed only a little at a time because it hardens very quickly. We spread it all over the mosaic with a palette knife and then a rubber spatula to get the grout into all the cracks.


Then we waited about 20 minutes for it to set. The next step was to wipe off the excess grout with a damp sponge to make sure we could see all of the tiles.


After another 24 hours, it was time to wipe the whole thing with a soft clean rag and make it shine! Abbi also added a little clown face to her cartwheeling clown. She could paint the edges of the mosaic too, but we ran out of time. (She'll probably do that at home.)