Sunday, October 23, 2022

Owls in Oil Pastel


These oil pastel owls are clearly a favorite, especially around Halloween! You would never know it, but the teen artists who created these beauties are new to oil pastel as an art medium. Most have never used them before. 


The artwork was created on black sulfite paper using a reference photo. A piece of white chalk was used to lightly sketch in the owl shape, which, from the frontal view, is basically the shape of a thumb. 

Easy peasy! 


Next, the eyes and beak were added and any other prominent features, such as a row of dark feathers around the face or "ear" feathers, etc. No tiny details are necessary at this stage; they are added with oil pastel later on.


Now our artists created their palettes for this project. They pulled colors from the pastel set, hold each one up to the resource photo. If it matched a color in the subject, the pastel stick is set aside for the project. This step saves tons of searching time later on! 

Each artist was also given a piece of black scrap paper for testing colors, textures, and special effects. Sometimes colors need to be layered to get the right shade or tone, so testing colors is important during the palette selection process. Black and white are always added to the palette as well. 


To begin filling in the owl, we first created the most expressive part of an owl - the eyes. 

Artists tried a practice eye first on their scrap paper. They found the right color or colors for the iris and made a good solid dot. Then they added a black circle or "owl eye" shape around it, and a good solid black pupil in the center of the iris. Now the eye is given life by adding a nice white reflective highlight (dot) somewhere in the eye. 


Now they were ready to create the owl's eyes, adding that white sparkle to the same spot in both eyes (both to the left or both to the upper right or whatever). 


The beak was then added and the feathers in the face were added as short lines radiating outward around the eyes and from the center of the face. 


Beginners find that it becomes easier and easier to add textures, patterns, colors, and larger feathers as you work and become more accustomed to using the oil pastels. I also believe the lifelike eyes give young artists an instant boost of self confidence right from the start - and as they proceed to complete the image.  


These artists were so proud of their owls! 

Fortunately I had extra black paper for them to take home to practice making even more oil pastel owls. Which they did.

See our previous weblog posts to learn more about oil pastel owl-making : 
                  Homeschool OWL ART!                  

Saturday, October 15, 2022

Awesome Papier Mache'


Once in a while young artists need to make something a little more than art that simply hangs on the wall. They want more!

So we decided to try working in 3D, and the kids wanted to try papier mache'. 


This two-week project was a lot of fun and our artists were thrilled with their papier mache' sculptures!

The first step is to decide what to make. All of our artists decided to make some sort of bird. 

The next step is to construct the "skeleton" of the object using materials like cardboard, newspaper, and masking tape.


Next, the object is covered with strips of newspaper dipped into a papier mache' solution. Our recipe was 1 cup white flour, 2 cups very warm water, 1/2 tsp salt, and 1/4 bottle white glue.


Notes: the solution should be mixed, and then whisked until all lumps are removed and it has the consistency of pancake batter. Papier mache' can be stored no more than a few days in the refrigerator in a covered bowl or jar.

The art object is then allowed to dry, at least 24 hours, until it is stiff and hard. 


Now it's time to paint! This artist is painting her crow using resource photos found in an Audubon Field Guide.


If the art object was to going to be a light color, such as this snow owl, it needed be pre-painted first using flat white paint (or gesso) to hide the newspaper ink. Then, after the underpainting dried, the artist could proceed painting the object as desired. 


This artist is adding details to her life-size peregrine falcon. 

Once the paint is dry, the sculpture is sprayed with glossy sealant, and additional elements can be added, such as talons made from bent wire.


These artists definitely want to try papier mache' again!

Friday, September 30, 2022

More Bears in the Berries!

Bears in the Berries

The air is crisp and days are shorter,

Bears need something sugary sweet.

A yummy something in short order.

Berries – yes! Now life’s complete!

Messy juicy purply good,

Such a yummy treat!

Love this berry neighborhood,

Juicy – messy – eat – repeat!


Yes, we've found bears in the berry patch - again!


Caught 'em red (or purple) handed!

Our bear mamas and children are painted very carefully in watercolor and completed with Sharpies and colored markers. Notice all of the furry detail and the expressions of surprise!

These paintings could be illustrations in a children's book, couldn't they? Find out more about this painting lesson in our original Bears in the Berries post.

Friday, September 23, 2022

Sunny Sunflowers


This week, as we approach the end of summer, we painted these cheerful sunny sunflowers!


First we examined photos of sunflowers from our resource files, which just so happens to include a sunflower-themed calendar!

The next step was to paint a bulls-eye shape, starting with a dot near (but not directly in) the center of the paper, and another near a corner. The rings could be any color at all, which was a great opportunity for mixing new colors!


After the rings were dry, we painted patterns over them in black or white, such as dots, zigzags, and wavy lines, with a fine detail brush.  We also painted the negative space around the petals - the background - which better defined the positive space.


Then we added a few more details (leaves?) to the background, outlined more areas as needed,  and added some little critters!

The results are so bright and cheery, don't you think?


Take a look at our previous Sunflower post to learn more 
about this cheerful painting project.

Thursday, September 15, 2022

An Open Studio Day

Landscape - watercolor and tempera

Once in a while, I like to provide some "open studio" time for our young artists. 

They have ideas. 

They have plans. 

Raptor - oil pastel on sulfite paper


The work space and supplies are here, and my job to get them set up and to assist as needed. 

Fishing on a River - watercolor 


This little watercolor depicts a boat floating along a river, as seen from above! Notice the fishing poles and all the fish just beneath the water's surface.


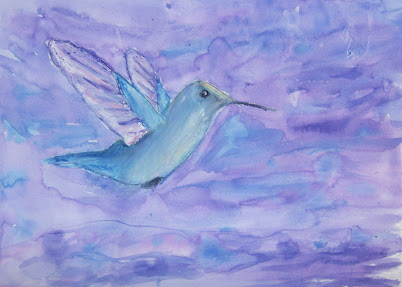
Hummingbird - oil pastel and watercolor

Friday, August 19, 2022

Makey-Makey Camp!


Makey-Makey Art Camp continues at the Blackfoot Art Center! 


For the last two class sessions (partially due to the heat) we moved indoors and explored our MakerSpace and the concept of making (which comes quite naturally to most young artists.) 


Campers were challenged to make anything they liked from the materials available to them. They could choose from our Makers' handouts, such as Flexigon fidget toys or this balancing Robot.


This week we decided to make some duct tape projects. Shown here is a pencil pouch with a clear window and a ziplock closure. 


Boys' wallet - outside

We also made folding wallets such as this one.  This folding wallet has a window pocket, two card pockets, a secret pocket, and pocket for bills!


Boys' wallet - inside


We even made a special "Artistic License" to place inside the window pocket.


More custom made wallets:

Another option was to make something from our cardboard scrap pile and/or our junk box - I mean Treasure Chest! Or, campers could simply make something from a cardboard box. All of the studio supplies were available to them, including construction paper, glue, tape (six types!), staplers, markers, and anything else on our shelves. 


I have learned that kids love to make things that they can use or play with later on, such as the balancing robot (shown above), or this Flexagon fidget toy...

... or this tabletop Skeeball game! 


The game was constructed from a flat cardboard box and includes a rubber band marble launcher and a marble holder. It also folds for easy portability. Wow!


Also popular with Makers are models, which are the first step in the design process. Of course, some makers create a sketch first, but many dive right into building the model itself. Here is an intricate model of a vending machine, which was a collaborative project between two siblings.


Model of a toy vending machine

Vending machine side opening

Vending machine graphics