Saturday, October 05, 2019

Open Studio Art Classes!


October is a great month for "open studio" art classes. Why? Because Halloween art is exciting and super fun to make! 

Everyone either has great ideas for making their own Halloween-themed art OR is looking for spooky art-making ideas and opportunities. 


Our job is to provide a place, supplies, materials, and inspiration. Our students do the rest, because they are the artists and this is their studio. 


This week many of our artists worked on Halloween Inchies, one of our favorite Halloween projects. 

These are tiny, 4" x 4" mini-masterpieces that are fun to design and even more fun to make!


These artists decided to paint a Halloween scene. They are experimenting with color mixing, charcoal, and mixed media.
 
 
This artist learned how to blend acrylic paint colors and add an oil pastel "web" over the dried paint for his 3-D spider. 


Oil pastels are a popular medium for spooky nighttime scenes (on black paper).


A few pieces of art and cardboard tube characters made in Open Studio.
This artist traced the shape of dinosaur toys to create these realistic drawings.
(Of course, the Halloween-theme isn't required in Open Studio.)
One of our younger artists painted this a spooky pumpkin patch.
This artist created a spooky moonlit scene from a popular Halloween movie.

Many of our Friday class artists used their Open Studio to create the Halloween-themed inchies below. They might choose to frame each one, or they might mount them, grid-style, on a square of poster board. They will continue to develop their ideas throughout October for even more inchies to add to their collections!
                               

Tuesday, October 01, 2019

Spooky Jack-O-Lanterns


Our homeschoolers couldn't wait another second to start celebrating Halloween, so we started the month by making these spooky charcoal jack-o-lanterns.

First we toned the paper by lying a piece of charcoal on its side and rubbing over the paper (an leaving a white edge). The we rubbed it down with a soft paper towel.


Then we lightly sketched in the pumpkin shape and added a shadow to one side to help us know where our light source would be. We continued to add shadows to create the illusion of a roundish 3-dimensional pumpkin.


We blended with our fingers as we went along (and wiped our fingers with a semi-damp cloth now and then). Then, using a soft white eraser, we removed charcoal from the upper and light side of the pumpkin.

Next we added a stem and a jack-o-lantern face.  And finally, we added a spider web and a big scary spider!


Some of us (including me) chose to add just the faintest bit of soft pastel color to our Jack, as though the light was slowly fading to darkness. 
My sample
Our thanks to the Art Teacher in LA for this great lesson idea!

Saturday, September 28, 2019

Unicorns!


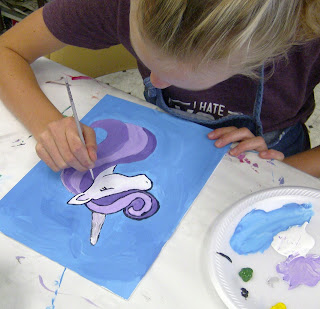
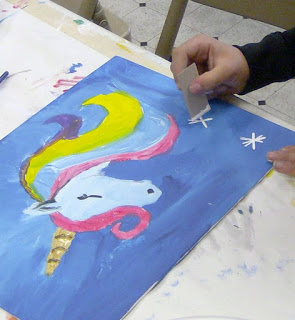
This week our Friday classes painted UNICORNS! 

This was a bit different than a normal art class lesson in that it was a choice-based art project. 

Our goal is always to encourage self-expression and creativity, even within the parameters of the given project or process. However, everyone wanted to paint the unicorn like the one hanging on our wall, so I decided to offer choices and options to make the unicorn their own. This was my effort to lean more towards TAB art education methodology (Teaching for Artistic Behavior) and to not produce a roomful of look alike artwork. 

I would like to incorporate TAB in as many of our art projects as possible. 


Choices and options:
What media will you use? Options might be watercolor, tempera paint, or acrylic paint.

What will you paint on?
Surfaces might include a canvas panel or watercolor paper (depending on paint media).


What drawing method will you use? I encourage freehand drawing, but for the sake of getting to the process of painting I collected a variety of unicorn templates for them to choose from to trace & transfer. 

What will be in the background? Landscape, sky, rainbow colors?


What will be your color scheme?
Analogous colors, color tints, or maybe rainbow colors?

Will you add an outline?

How will you finish your painting?


These artists all chose to use a favorite unicorn image template and many used carbon paper for the very first time. It was so fun to see them lift the corners and see the image transferring to the canvas like magic! This allowed them to not sweat the drawing and move on to the real fun of painting in their unicorns!


Everyone also chose to paint on canvas except for this young artist who has a cast on his dominant arm and decided that watercolor would be easier to handle. I think he was right! 

Monday, September 23, 2019

Beautiful Sunflowers!!!


To commemorate the end of summer, we painted  these gorgeous SUNFLOWERS!


First we examined resource photos of sunflowers, like this one that grew in my yard a few years ago. 


We also observed a vase of sunflowers and similar flowers (like black-eyed susans), and a few paintings of sunflowers.


Using liquid temperas, we then painted a dot somewhere near the center of the paper but not right in the center.  Then we created a bulls-eye type design around the dot using any chosen colors. 


We then mixed a bit of orange into our yellow paint and created the petals of our flower. We also added a bit more orange to the petals to create depth. Some also added a bit of yellow-green. Then we painted another smaller flower in one of the corners (if there was room).


The next step was challenging but fun! We added patterns to inside of our sunflower, like dots, zigzags, short lines, and curvy lines. Some were white but most were black. 

(We used a stylus to paint many of our little dots.)


Next, we painted the background around the flower using as many tints and tones of green as we could make and/or share.


The last step was to add a critter! 

Our artists added ladybugs, butterflies, ants, spiders, and beetles.


Our artists ranged in age from 6 to 12 years old. 


This is my sunflower sample.


This lovely sunflowers were created by a 6-year-old!